In-depth Study - ELK, Kafka, Spark
The in-depth study documentation for the graduate level course COMS 6998: Cloud Computing & Big Data taken in Fall 2020 @ Columbia. Topics include the ELK Stack, Kafka (w/ AWS MSK), Spark (w/ AWS EMR) and an end-to-end Real-time Credit Card Fraud Detection Pipeline implementation.
Table of Contents
- 1. Task 1: ELK Stack
- 2. Task 2: Kafka Setup
- 2.1. Kafka Installation
- 2.2. Example of a Kafka messages producing and consuming pipeline
- 2.3. Create a Kafka pipeline on AWS MSK
- 3. Task 3: Spark Setup
- 4. Task 4: Real-time Credit Card Fraud Detection Pipeline
1. Task 1: ELK Stack
1.1. ELK Stack Installation
I followed the tutorial The Complete Guide to the ELK Stack to digest the basic concepts of the ELK Stack and tutorial Installing the ELK Stack on Mac OS X to install the required services using Homebrew. The screenshot below reflects the success of installation.

1.2. Example of a Logstash pipeline sending syslog logs into the Stack
In this example, I implemented a Logstash pipeline that collects system log data and shipping them into the Stack. Then, created the index pattern syslog-demo in Kibana to visualize the syslog data.
1.2.1. Implementation details
1.2.1.1. Start services Elasticsearch and Kibana
brew services start elasticsearch
brew services start kibana
1.2.1.2. Create a new Logstash configuration file
# Make the directory
sudo mkdir -p /etc/logstash/conf.d
# Locate to the configuration folder
cd /etc/logstash/conf.d
# Create the conf file
sudo vim  /etc/logstash/conf.d/syslog.conf
Enter the following configuration in the syslog.conf file:
```
input {
    file {
        path => [ "/var/log/*.log", "/var/log/messages", "/var/log/syslog" ]
        type => "syslog"
    }
}

filter {
    if [type] == "syslog" {
        grok {
        match => { "message" => "%{SYSLOGTIMESTAMP:syslog_timestamp} %{SYSLOGHOST:syslog_hostname} %{DATA:syslog_program}(?:\[%{POSINT:syslog_pid}\])?: %{GREEDYDATA:syslog_message}" }
        add_field => [ "received_at", "%{@timestamp}" ]
        add_field => [ "received_from", "%{host}" ]
        }
        syslog_pri { }
        date {
        match => [ "syslog_timestamp", "MMM  d HH:mm:ss", "MMM dd HH:mm:ss" ]
        }
    }
}

output {
    elasticsearch {
        hosts => ["127.0.0.1:9200"]
        index => "syslog-demo"
    }
    stdout { codec => rubydebug }
}
```
1.2.1.3. Start the Logstash pipeline
Make sure under the directory /etc/logstash/conf.d/, then run logstash -f syslog.conf to start the pipeline giving the following logs: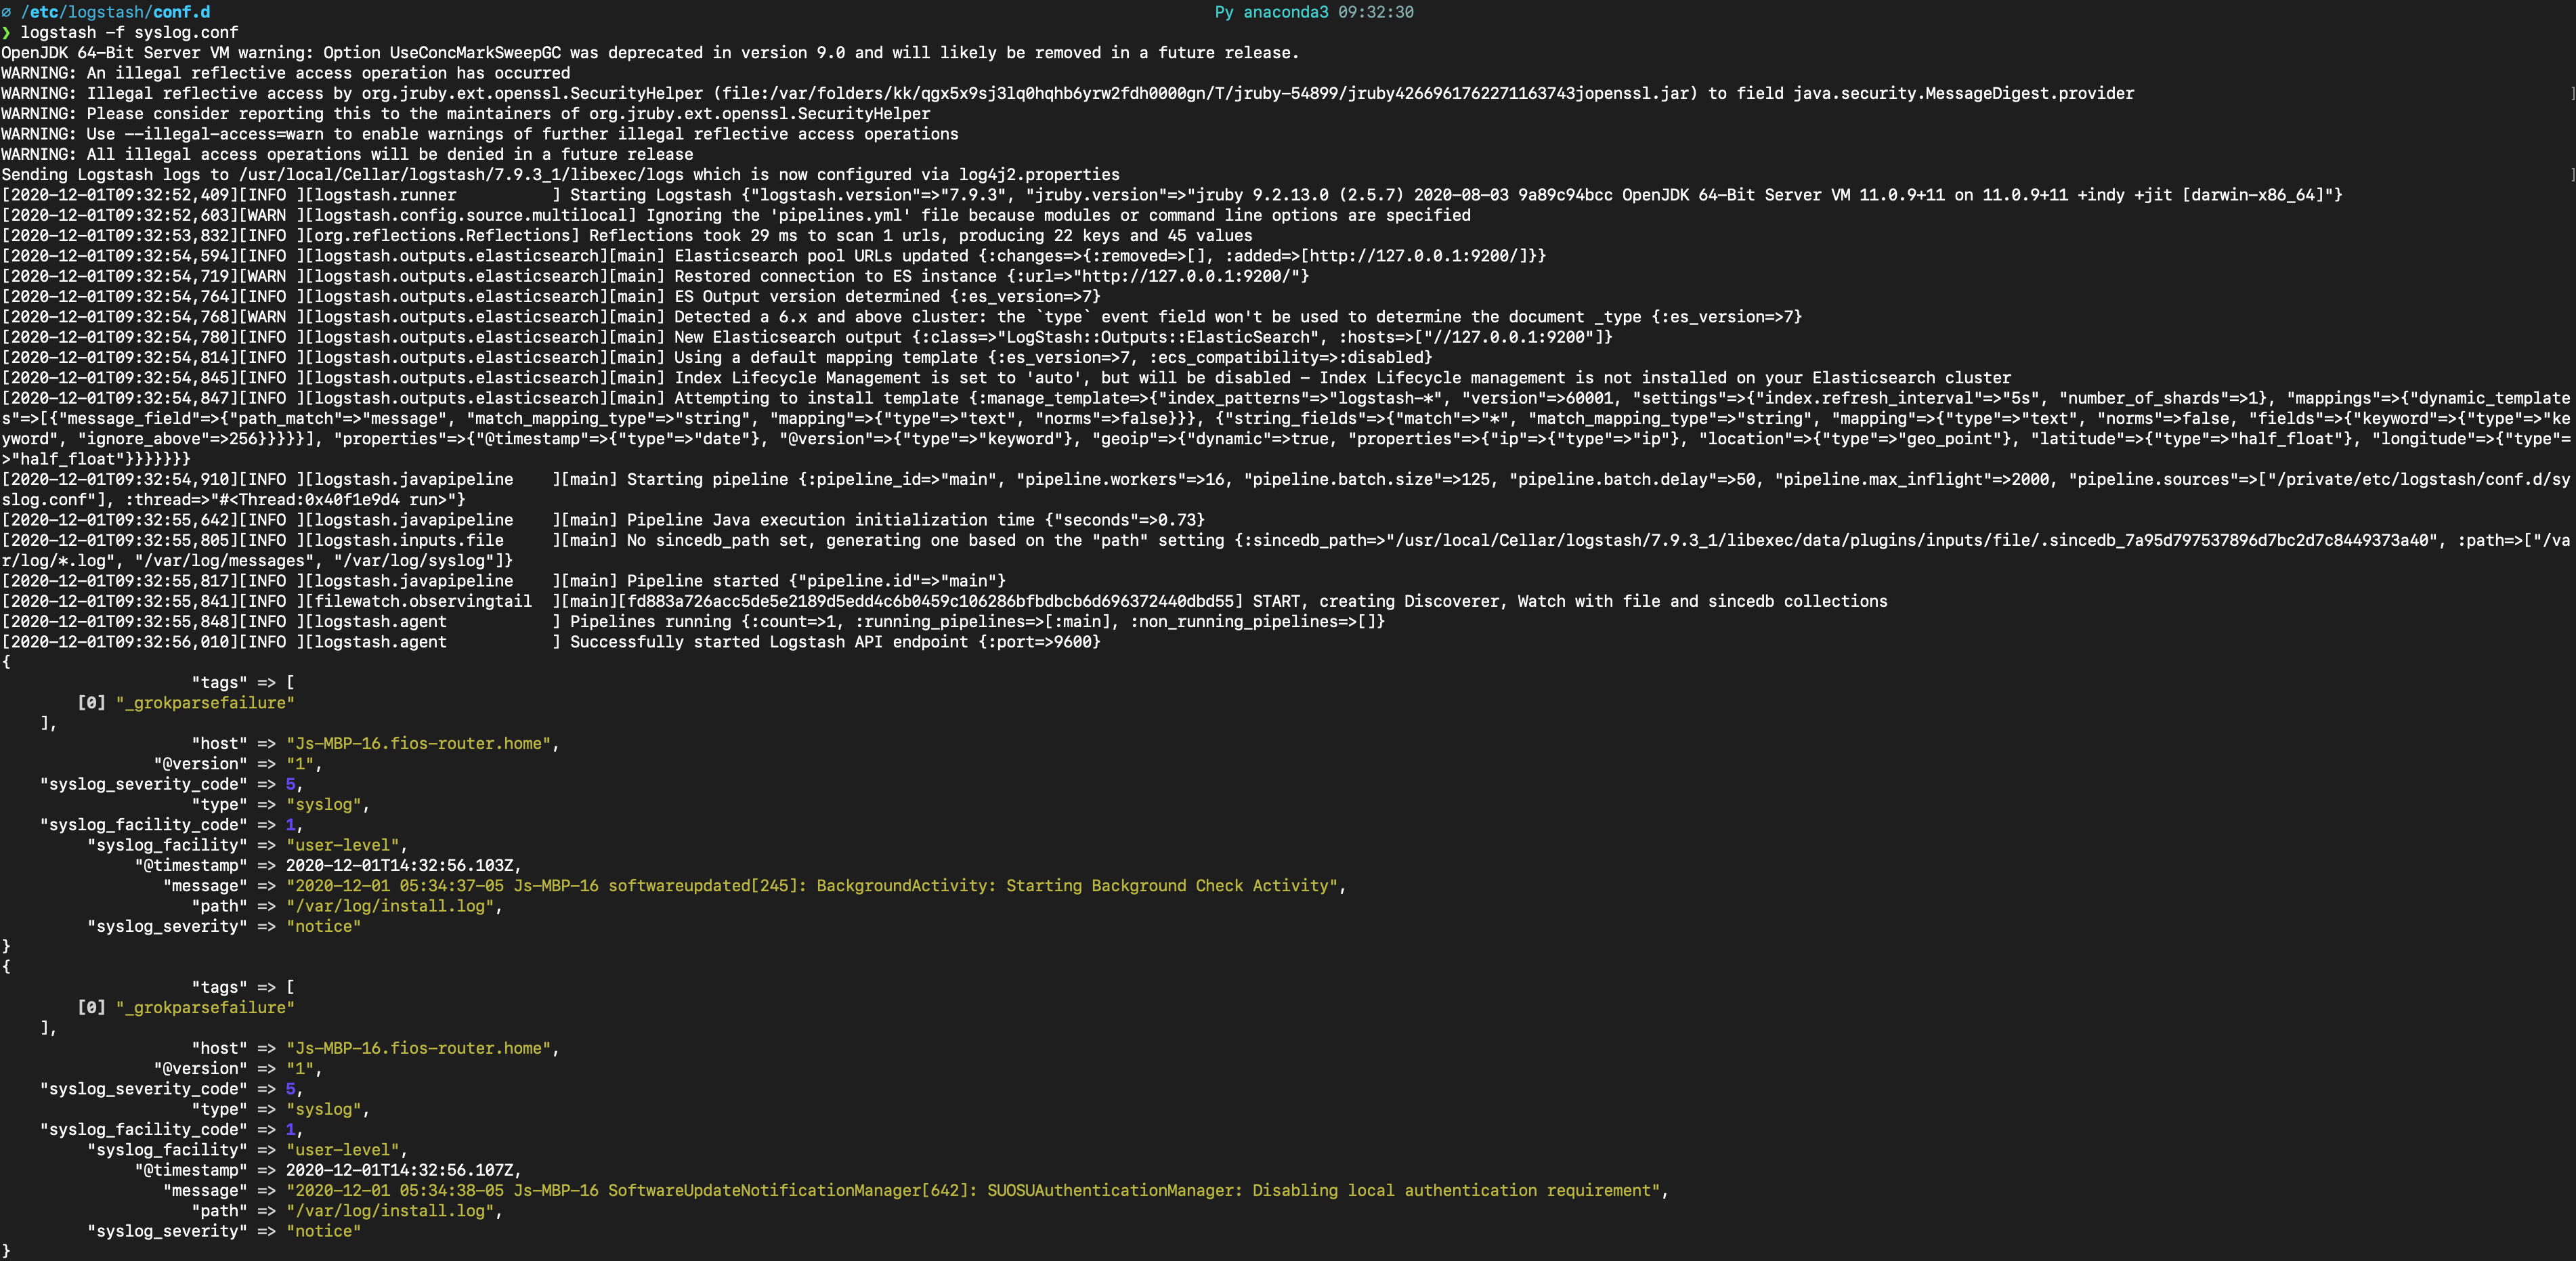
In Kibana (by accessing https://localhost:5601), initialized an index pattern with the index name syslog-demo created by the Logstash pipeline and selected @timestamp field as the Time Filter field name.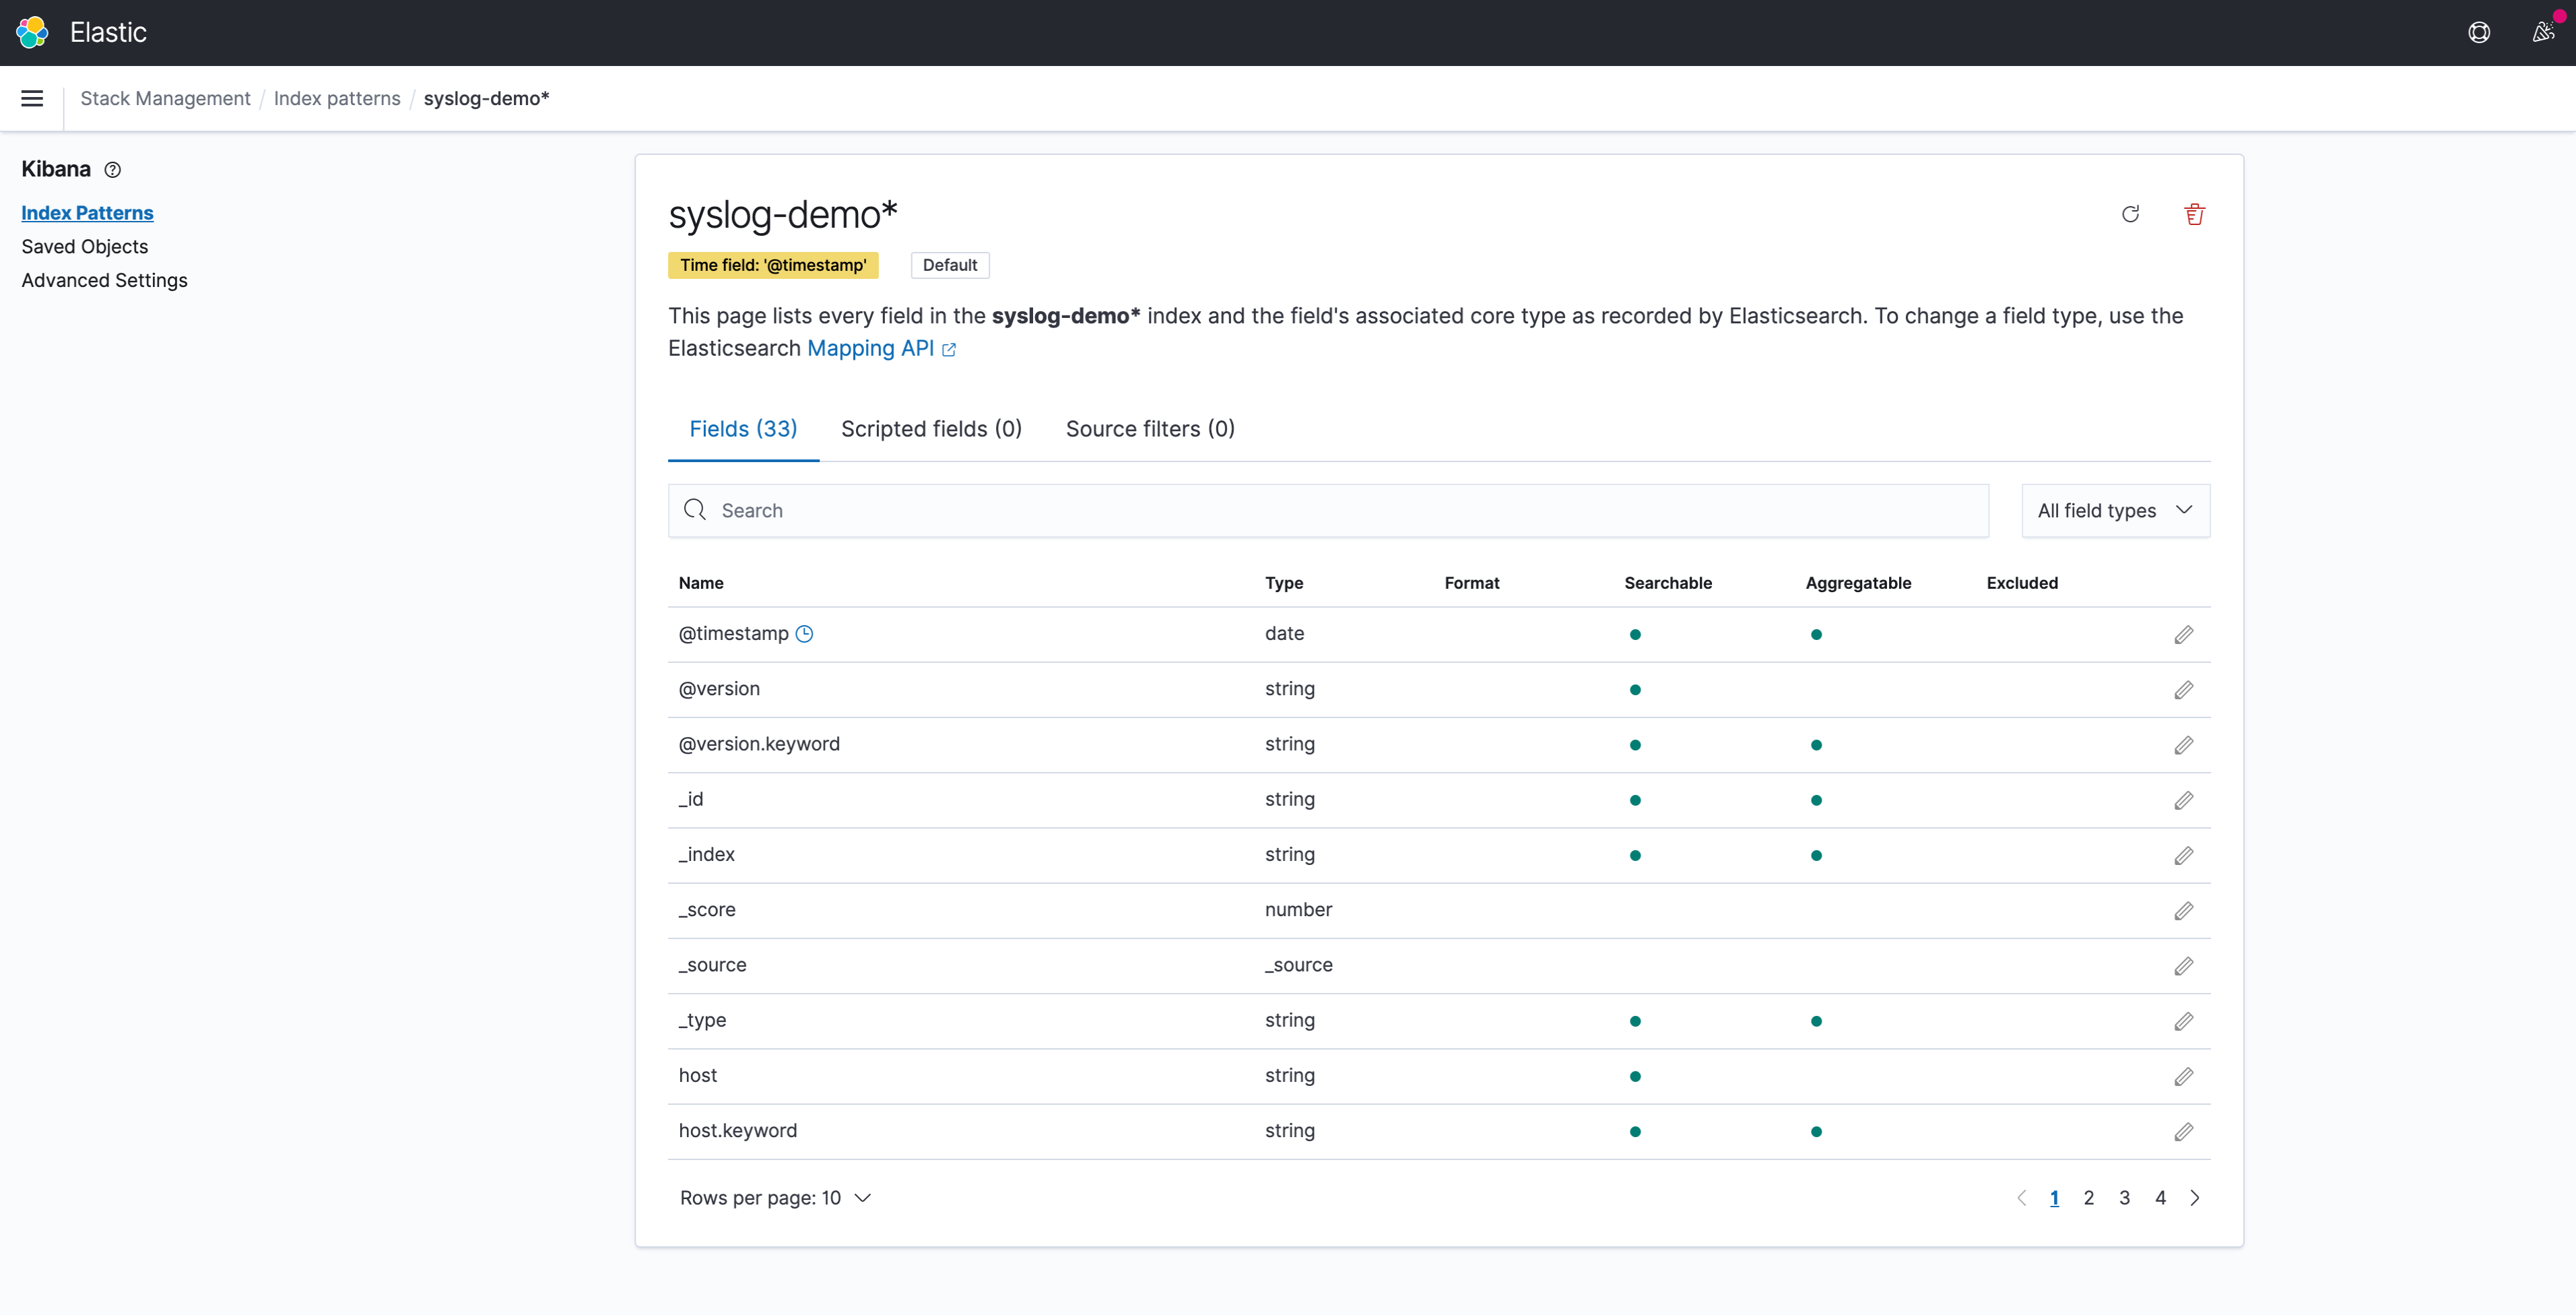
Under the Discover page, syslog data could be found: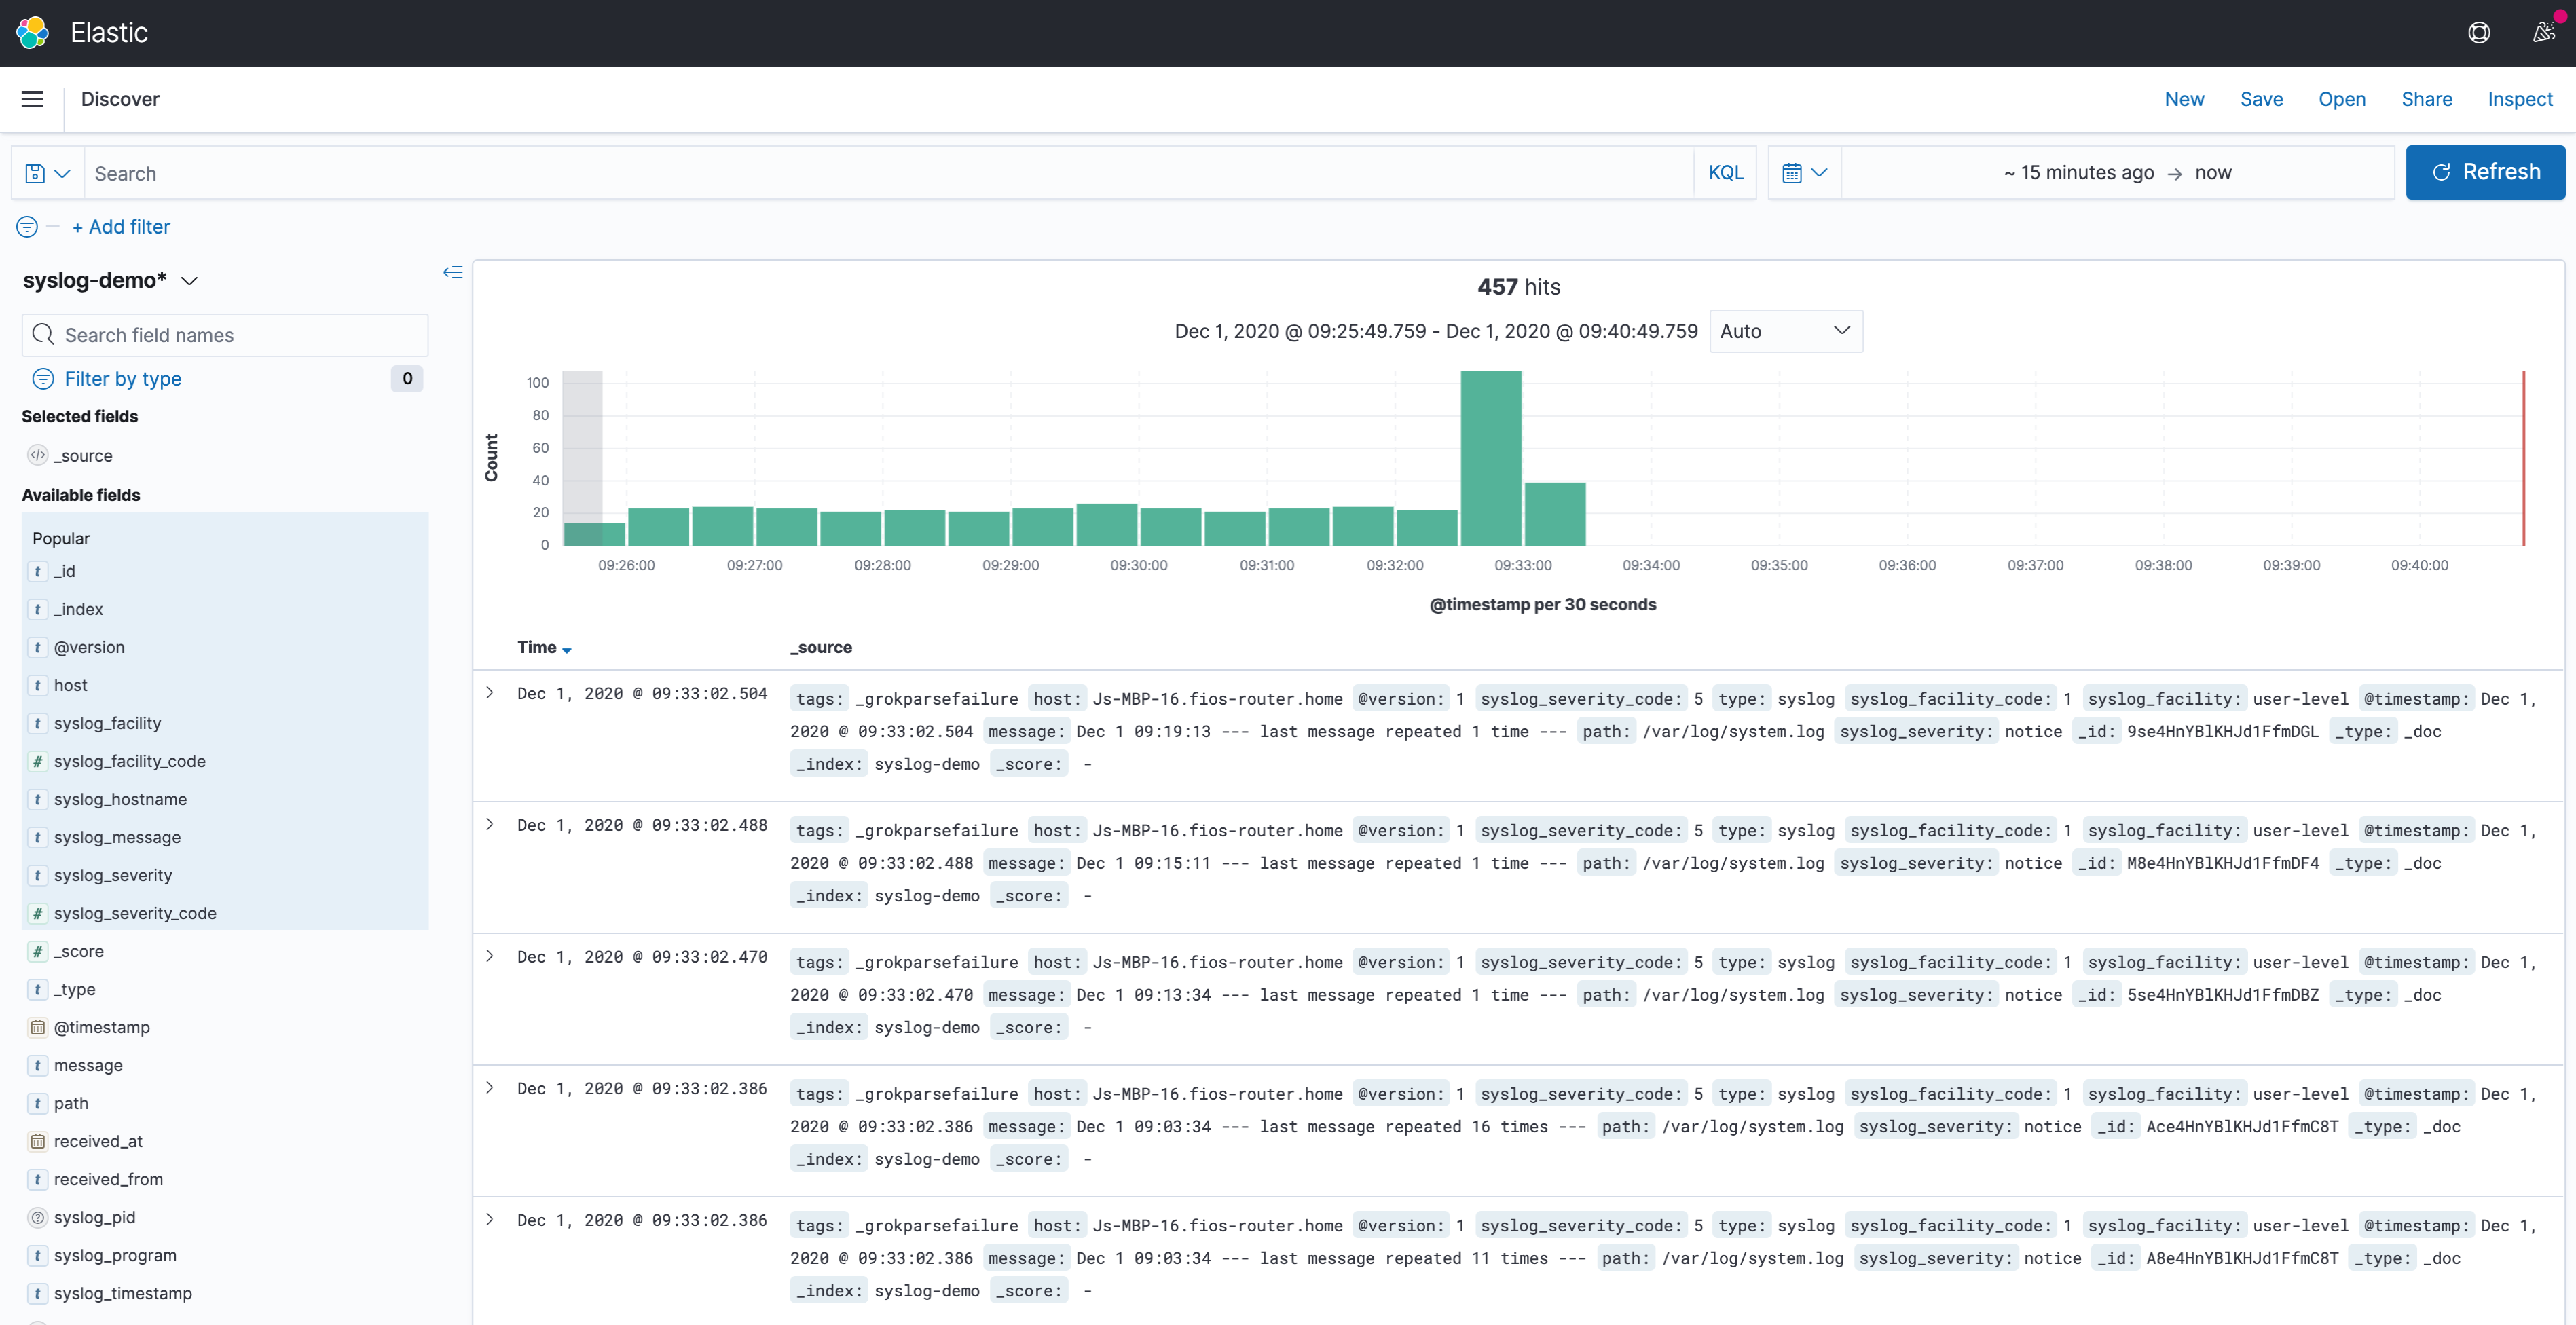
2. Task 2: Kafka Setup
2.1. Kafka Installation
Working on Mac, I choose to use Homebrew for installation:
# This will install Java 1.8, Kafka, ZooKeeper at the same time
brew install kafka

# This will run ZooKeeper and Kafka as services
brew services start zookeeper
brew services start kafka
The screenshot below reflects the success of installation.
2.2. Example of a Kafka messages producing and consuming pipeline
2.2.1. Create a Kafka topic to store events
I name the topic as quickstart. And following code initialize that topic with 1 partition and 1 replication factor:
kafka-topics --create --bootstrap-server localhost:9092 --replication-factor 1 --partitions 1 --topic quickstart2.2.2. Produce messages to the created topic
Initialize the Kafka producer console, which will listen to localhost at port 9092 at topic quickstart. And then input three messages:
kafka-console-producer --bootstrap-server localhost:9092 --topic quickstart
>This is the first event.
>This is the second event.
>This is the third event.
2.2.3. Consume the messages produced by the producer
Open another Terminal window and initialize the Kafka consumer console, which will listen to bootstrap server localhost at port 9092 at topic quickstart from beginning:
kafka-console-consumer --bootstrap-server localhost:9092 --topic quickstart --from-beginningThe screenshot below reflects that the consumer successfully received the messages:
2.3. Create a Kafka pipeline on AWS MSK
2.3.1. VPC network configuration
Amazon MSK is a highly available service, so it must be configured to run in a minimum of two Availability Zones in the preferred Region. To comply with security best practice, the brokers are usually configured in private subnets in each Region.
For later one Amazon MSK to invoke Lambda, must ensure that there is a NAT Gateway running in the public subnet of each Region. I configure a new VPC with public and private subnets in two Availability Zones using this AWS CloudFormation template. In this configuration, the public subnets are set up to use a NAT Gateway.
The screenshot below reflects the VPC stack built from the template mentioned above: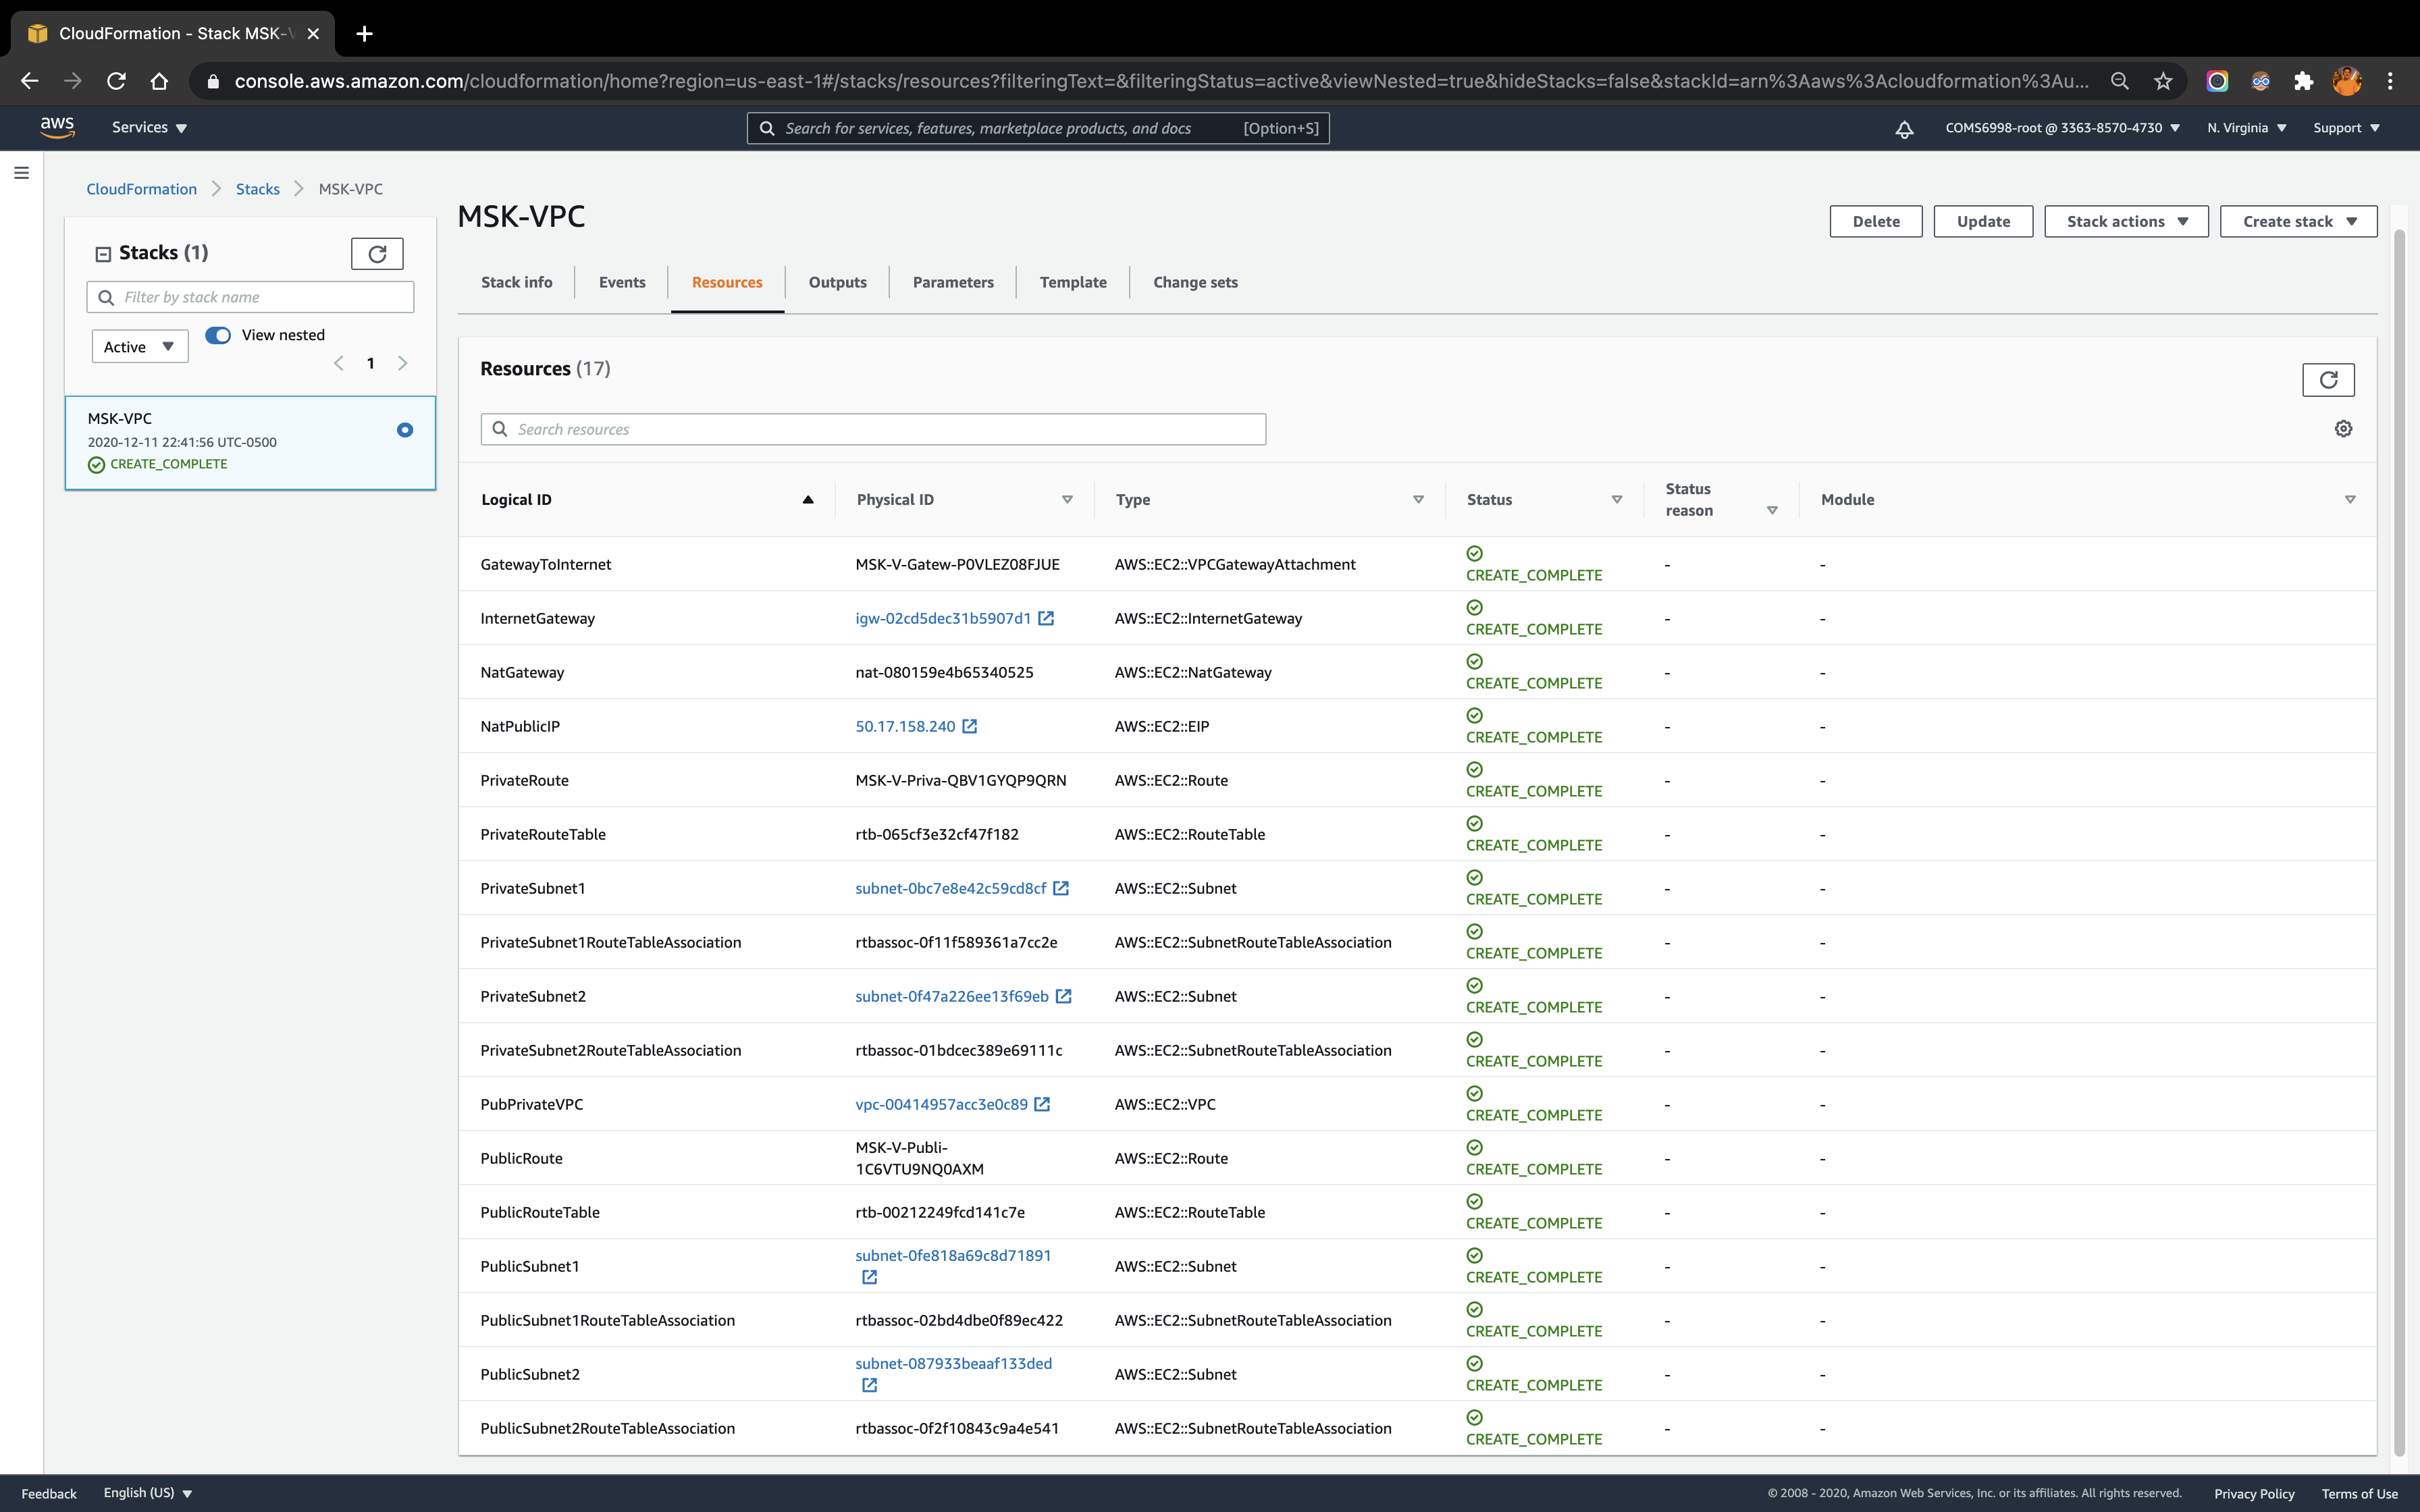
2.3.2. Create a Kafka cluster on AWS MSK service
Under AWS MSK, I create a Kafka cluster kafka-msk under the VPC created in the above step and choose 2 for Number of Availability Zones. For these two Availability Zones in the VPC, choose the private subnets for each. Also set 1 broker per Availability Zone. The screenshot below reflects the configuration of the cluster: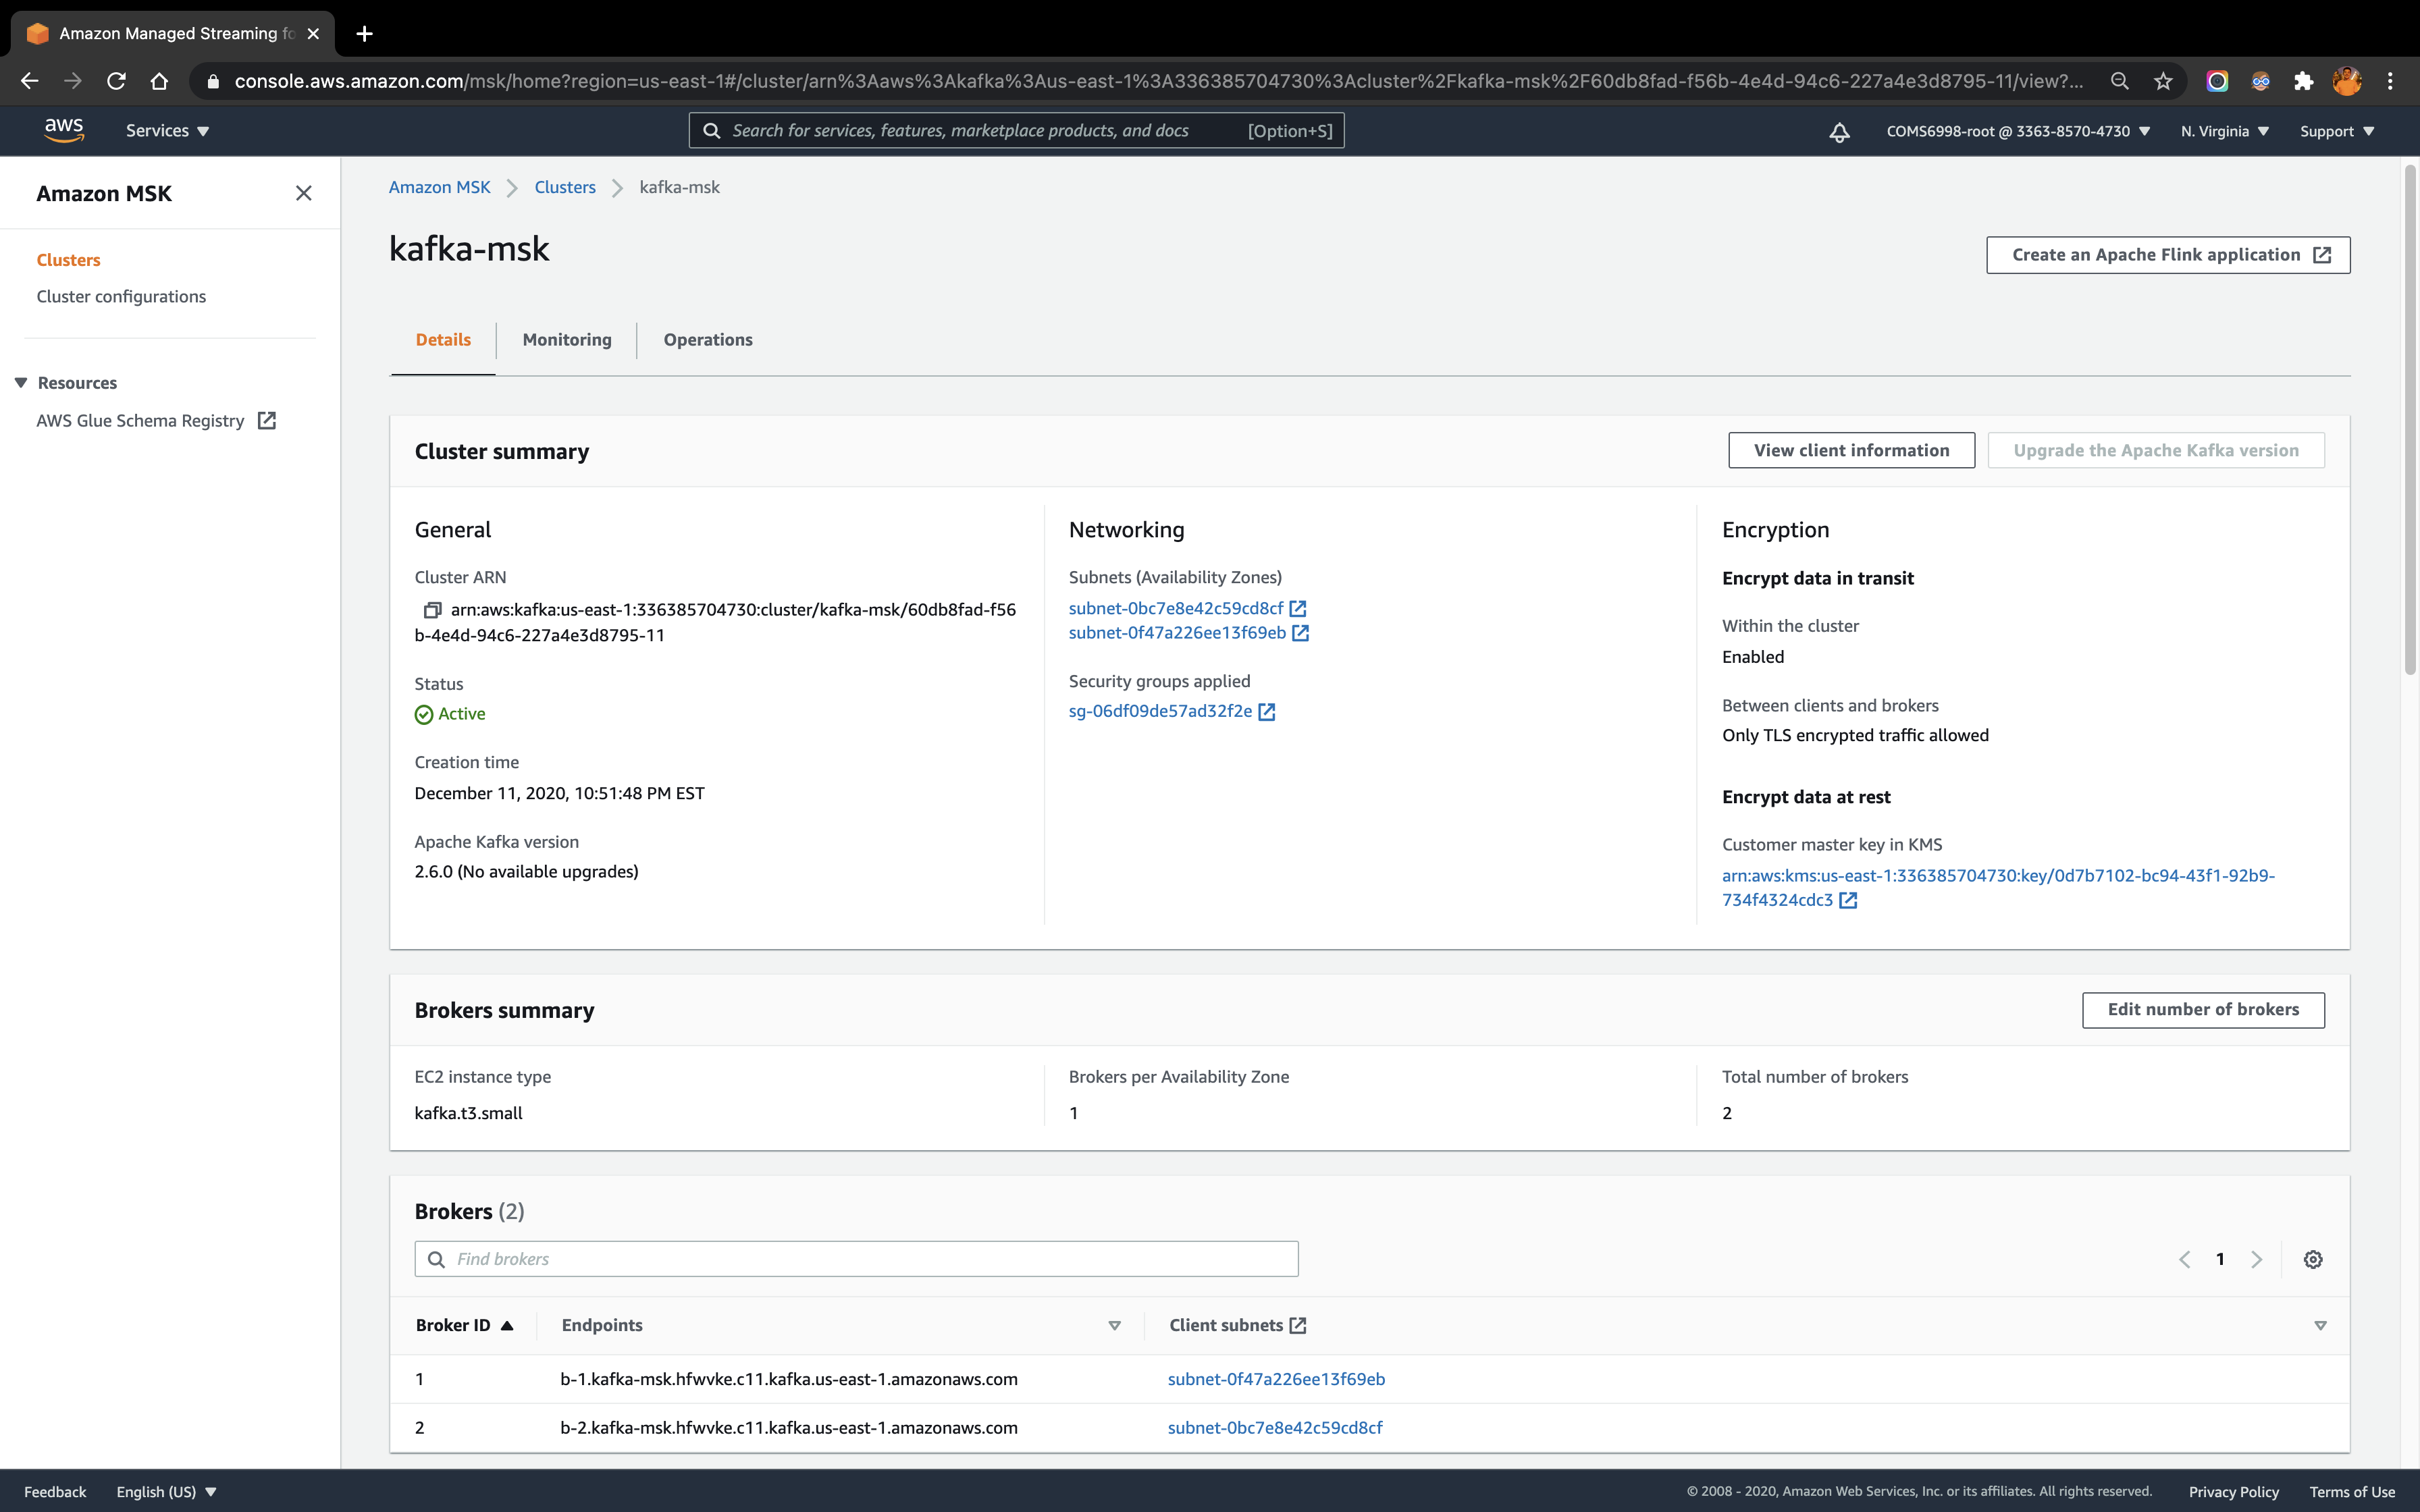
2.3.3. Create an EC2 instance and connect to the Kafka cluster
To access the Kafka cluster, I create an EC2 instance as a client machine under the same VPC as the cluster. From local Terminal, connect to the EC2 instance and set up the Kafka environment with the following code:
# Install Java
sudo yum install java-1.8.0

# Download Apache Kafka
wget https://archive.apache.org/dist/kafka/2.6.0/kafka_2.13-2.6.0.tgz

# Run the following command in the directory where downloaded the TAR file in the previous step
tar -xzf kafka_2.13-2.6.0.tgz

# Rename the kafka_2.13-2.6.0 folder as kafka
mv kafka_2.13-2.6.0 kafka

# Go to the kafka folder
cd kafka
kafka folder contains the environment library to run the Kafka functions. To connect to the cluster kafka-msk via Bootstrap server or Zookeeper connection, first need to retrieve the client information by clicking the View client information on the kafka-msk cluster Details page, which will give the following information: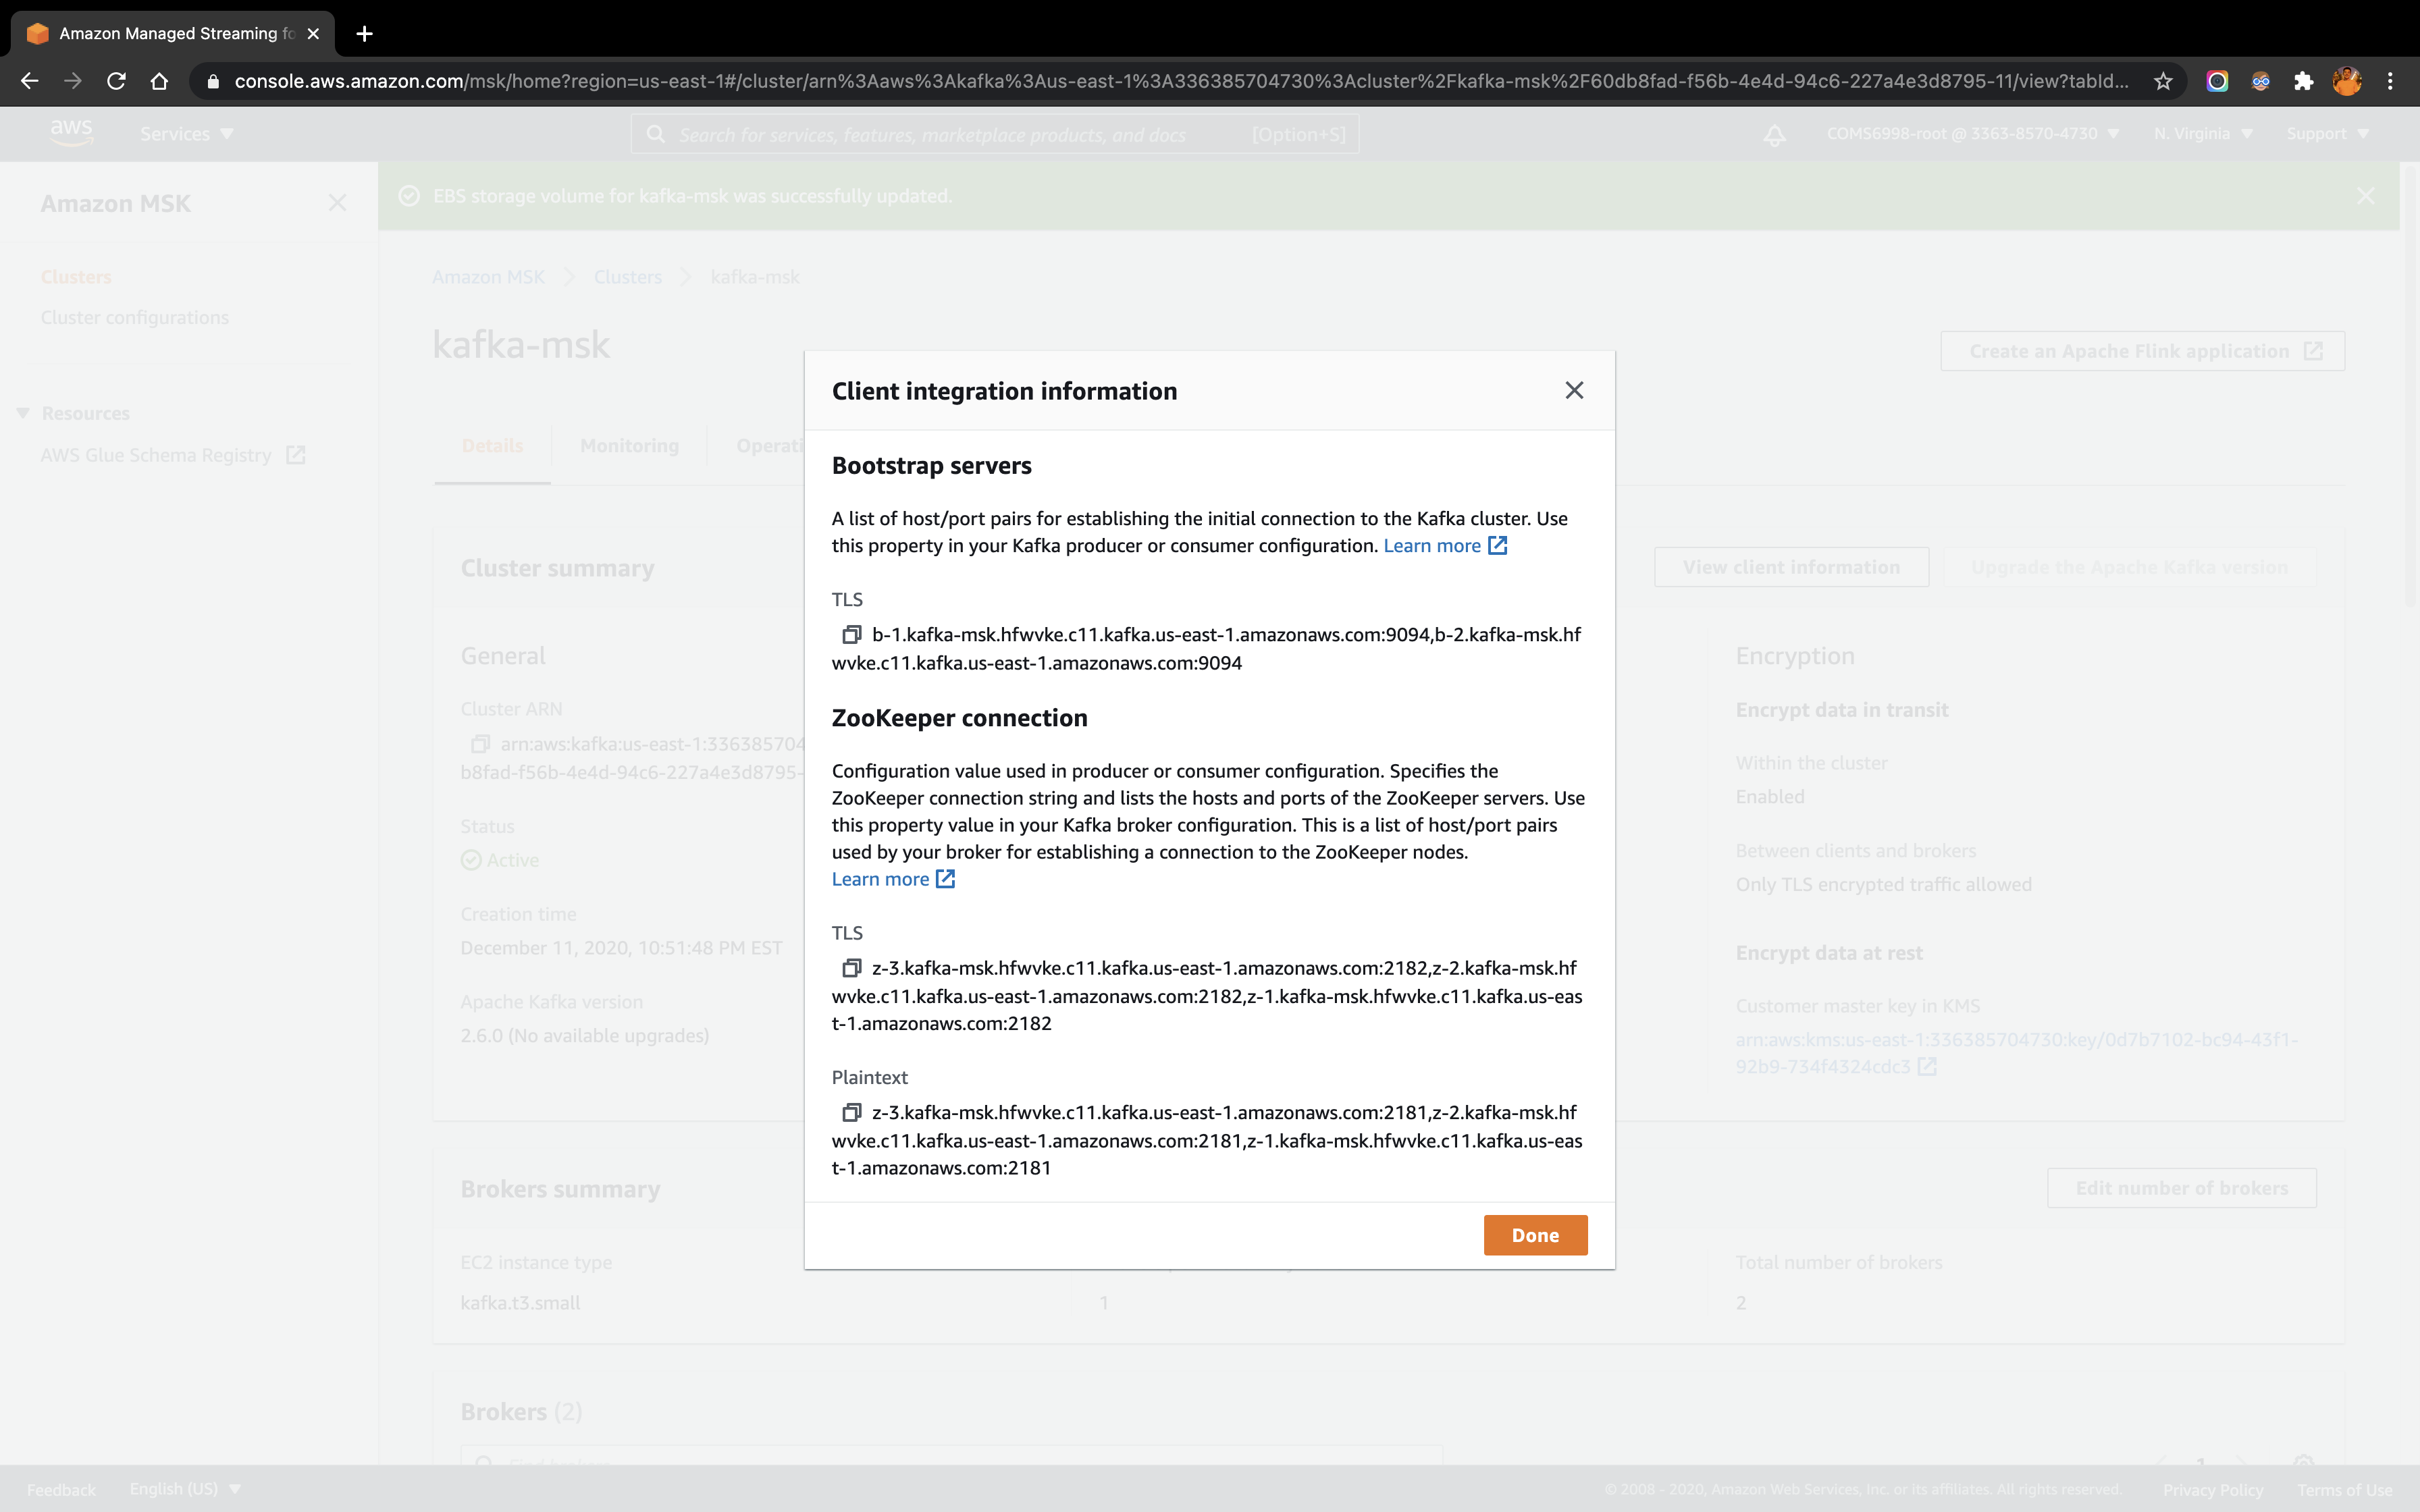
Copy the TLS host/port pairs information under the Bootstrap servers:
b-2.kafka-msk.hfwvke.c11.kafka.us-east-1.amazonaws.com:9094,b-1.kafka-msk.hfwvke.c11.kafka.us-east-1.amazonaws.com:9094Copy the Plaintext host/port pairs information under the ZooKeeper connection:
z-3.kafka-msk.hfwvke.c11.kafka.us-east-1.amazonaws.com:2181,z-2.kafka-msk.hfwvke.c11.kafka.us-east-1.amazonaws.com:2181,z-1.kafka-msk.hfwvke.c11.kafka.us-east-1.amazonaws.com:2181In the EC2 instance under kafka directory, run the following code to create a Kafka topic (also named as quickstart)
bin/kafka-topics.sh --create --zookeeper z-3.kafka-msk.hfwvke.c11.kafka.us-east-1.amazonaws.com:2181,z-2.kafka-msk.hfwvke.c11.kafka.us-east-1.amazonaws.com:2181,z-1.kafka-msk.hfwvke.c11.kafka.us-east-1.amazonaws.com:2181 --replication-factor 1 --partitions 1 --topic quickstartThen, run the describe command to make sure the topic is created successfully.
bin/kafka-topics.sh --zookeeper z-3.kafka-msk.hfwvke.c11.kafka.us-east-1.amazonaws.com:2181,z-2.kafka-msk.hfwvke.c11.kafka.us-east-1.amazonaws.com:2181,z-1.kafka-msk.hfwvke.c11.kafka.us-east-1.amazonaws.com:2181 --describe --topic quickstartThe following screenshot reflects the existence of topic quickstart:
To delete the topic just created, following code do that job:
bin/kafka-topics.sh --delete --zookeeper z-3.kafka-msk.hfwvke.c11.kafka.us-east-1.amazonaws.com:2181,z-2.kafka-msk.hfwvke.c11.kafka.us-east-1.amazonaws.com:2181,z-1.kafka-msk.hfwvke.c11.kafka.us-east-1.amazonaws.com:2181 --topic quickstartTo talk to the MSK cluster, we need to use the JVM truststore. To do this, first create a folder named /tmp on the client machine. Then, go to the bin folder of the Apache Kafka installation and run the following command:
cp /usr/lib/jvm/java-1.8.0-openjdk-1.8.0.265.b01-1.amzn2.0.1.x86_64/jre/lib/security/cacerts /tmp/kafka.client.truststore.jksWhile still in the bin folder of the Apache Kafka installation on the client machine, create a text file named client.properties with the following contents:
security.protocol=SSL
ssl.truststore.location=/tmp/kafka.client.truststore.jks
2.3.4. Produce and consume messages from the topic
2.3.4.1. Produce messages to the created topic
Go to the bin folder first. Similarly, initialize the Kafka producer console, but listen to the cluster kafka-msk in MSK this time using Bootstrap server at topic quickstart. And then input the same three messages:
./kafka-console-producer.sh --bootstrap-server b-1.kafka-msk.hfwvke.c11.kafka.us-east-1.amazonaws.com:9094,b-2.kafka-msk.hfwvke.c11.kafka.us-east-1.amazonaws.com:9094 --producer.config client.properties --topic quickstart
>This is the first event.
>This is the second event.
>This is the third event.
The screenshot below reflects the process of producing messages:
2.3.4.2. Consume the messages produced by the producer
Still stay in the bin folder. Similarly, initialize the Kafka consumer console, and listen to the cluster kafka-msk at topic quickstart from beginning:
./kafka-console-consumer.sh --bootstrap-server b-1.kafka-msk.hfwvke.c11.kafka.us-east-1.amazonaws.com:9094,b-2.kafka-msk.hfwvke.c11.kafka.us-east-1.amazonaws.com:9094 --consumer.config client.properties --from-beginning --topic quickstartThe screenshot below reflects that the consumer successfully received the messages:
2.3.5. Using Amazon MSK as an event source for AWS Lambda
Follow this blog post for most parts of configuration to allow a Lambda function to be triggered by new messages in a MSK cluster.
2.3.5.1. Required Lambda function permissions
The Lambda must have permission to describe VPCs and security groups, and manage elastic network interfaces. To access the Amazon MSK data stream, the Lambda function also needs two Kafka permissions: kafka:DescribeCluster and kafka:GetBootstrapBrokers. The policy template AWSLambdaMSKExecutionRole includes these permissions.
Therefore, I create a role in IAM as msk_lambda and attach the policy template AWSLambdaMSKExecutionRole with it for later use as the Execution role for the Lambda function.
2.3.5.2. Configure the Lambda event source mapping
First, I create a Lambda function Kafka_Lambda with runtime as Python 3.7. Meanwhile, make sure to attach the function under the same VPC and two private subnets as shown in the screenshot below:
Next, in the Terminal window that connected to the kafka-msk cluster, create a new topic as kafka-lambda using:
bin/kafka-topics.sh --create --zookeeper z-3.kafka-msk.hfwvke.c11.kafka.us-east-1.amazonaws.com:2181,z-2.kafka-msk.hfwvke.c11.kafka.us-east-1.amazonaws.com:2181,z-1.kafka-msk.hfwvke.c11.kafka.us-east-1.amazonaws.com:2181 --replication-factor 1 --partitions 1 --topic kafka-mskUnder the Lambda function Kafka_Lambda Configuration tab, add MSK cluster kafka-msk‘s topic kafka-lambda as the event source as shown below:
2.3.5.3. Produce a message in the topic to trigger the Lambda function
Connect to the EC2 instance and under the bin folder of the kafka environment, initialize the Kafka producer console and produce a message in the topic kafka-lambda:
./kafka-console-producer.sh --bootstrap-server b-1.kafka-msk.hfwvke.c11.kafka.us-east-1.amazonaws.com:9094,b-2.kafka-msk.hfwvke.c11.kafka.us-east-1.amazonaws.com:9094 --producer.config client.properties --topic kafka-lambda
>This is a test message to trigger Lambda function.
Then, back to the Lambda function and choose to view logs in CloudWatch. Select the latest log stream gives:
From the screenshot above, it is clear that the Lambda function was successfully triggered by the MSK cluster. The Lambda function’s event payload contains an array of records. Each array item contains details of the topic and Kafka partition identifier, together with a timestamp and base64 encoded message. Following code deployed under the Lambda function print out the event and records content, also decode the base64 encoded message that under the value attribute.
import json
import base64

def lambda_handler(event, context):
    print(event)
    record = event['records']['kafka-lambda-0'][0]
    print(record)
    msg = record['value']
    msg_bytes = base64.b64decode(msg.encode('ascii'))
    message = msg_bytes.decode('ascii')
    print(message)
3. Task 3: Spark Setup
3.1. Spark Installation
Working on Mac, I choose to use Homebrew for installation:
# Install Scala
brew install scala

# Install Spark
brew install apache-spark
The Spark environment will be installed under /usr/local/Cellar/apache-spark/3.0.1. And run spark-shell in the terminal to start the Spark server: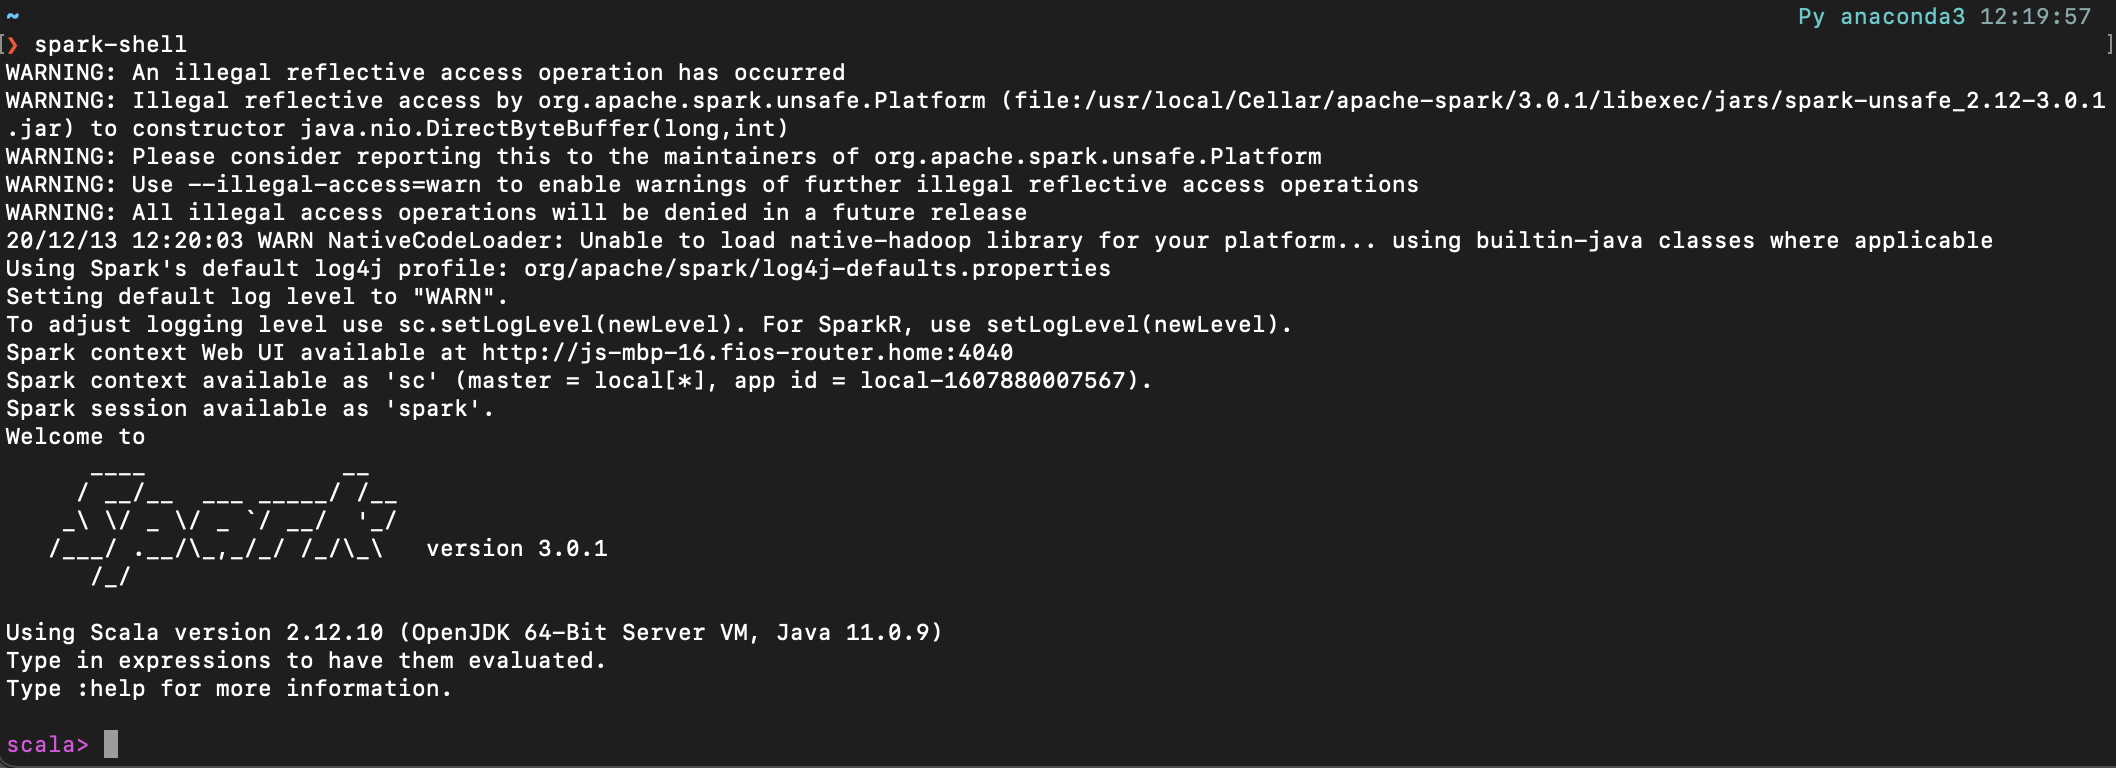
It is also available to start the Python Spark API server PySpark with pyspark: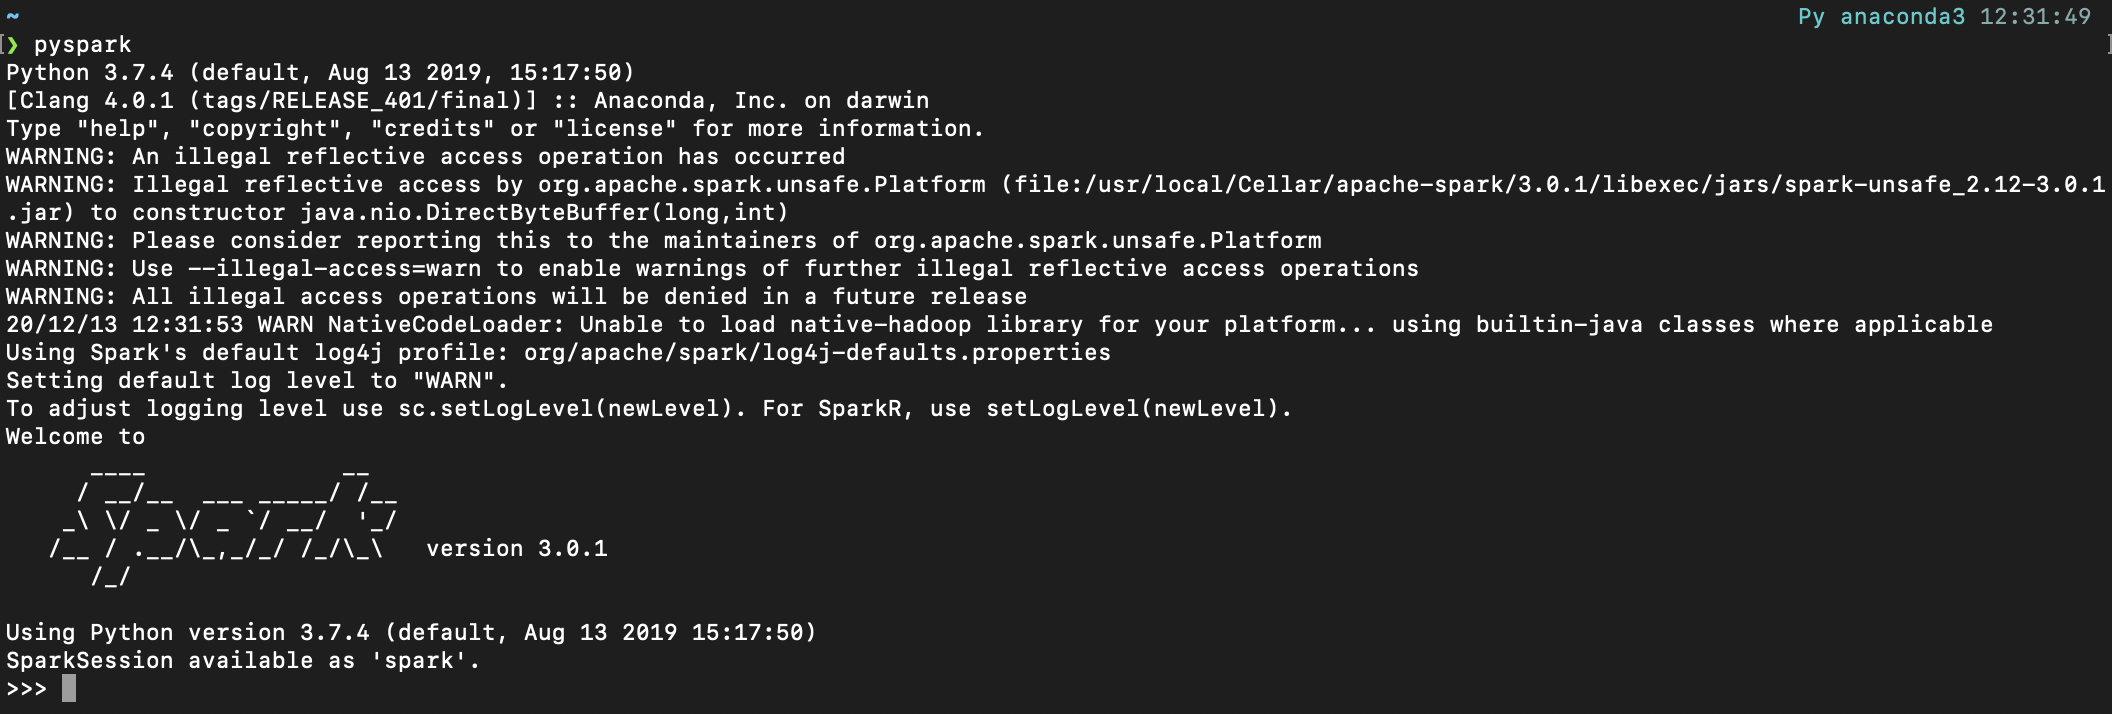
Keep the Spark server running, Spark user interface can be accessed through the link: https://localhost:4040/jobs/. Run the following Spark job in the Terminal shell, the UI would display the related job information:
>>> import pyspark
>>> from pyspark import SparkContext
>>> rdd = sc.parallelize([1,2,3,4,5,6,7,8])
>>> rdd.take(6)
[1, 2, 3, 4, 5, 6]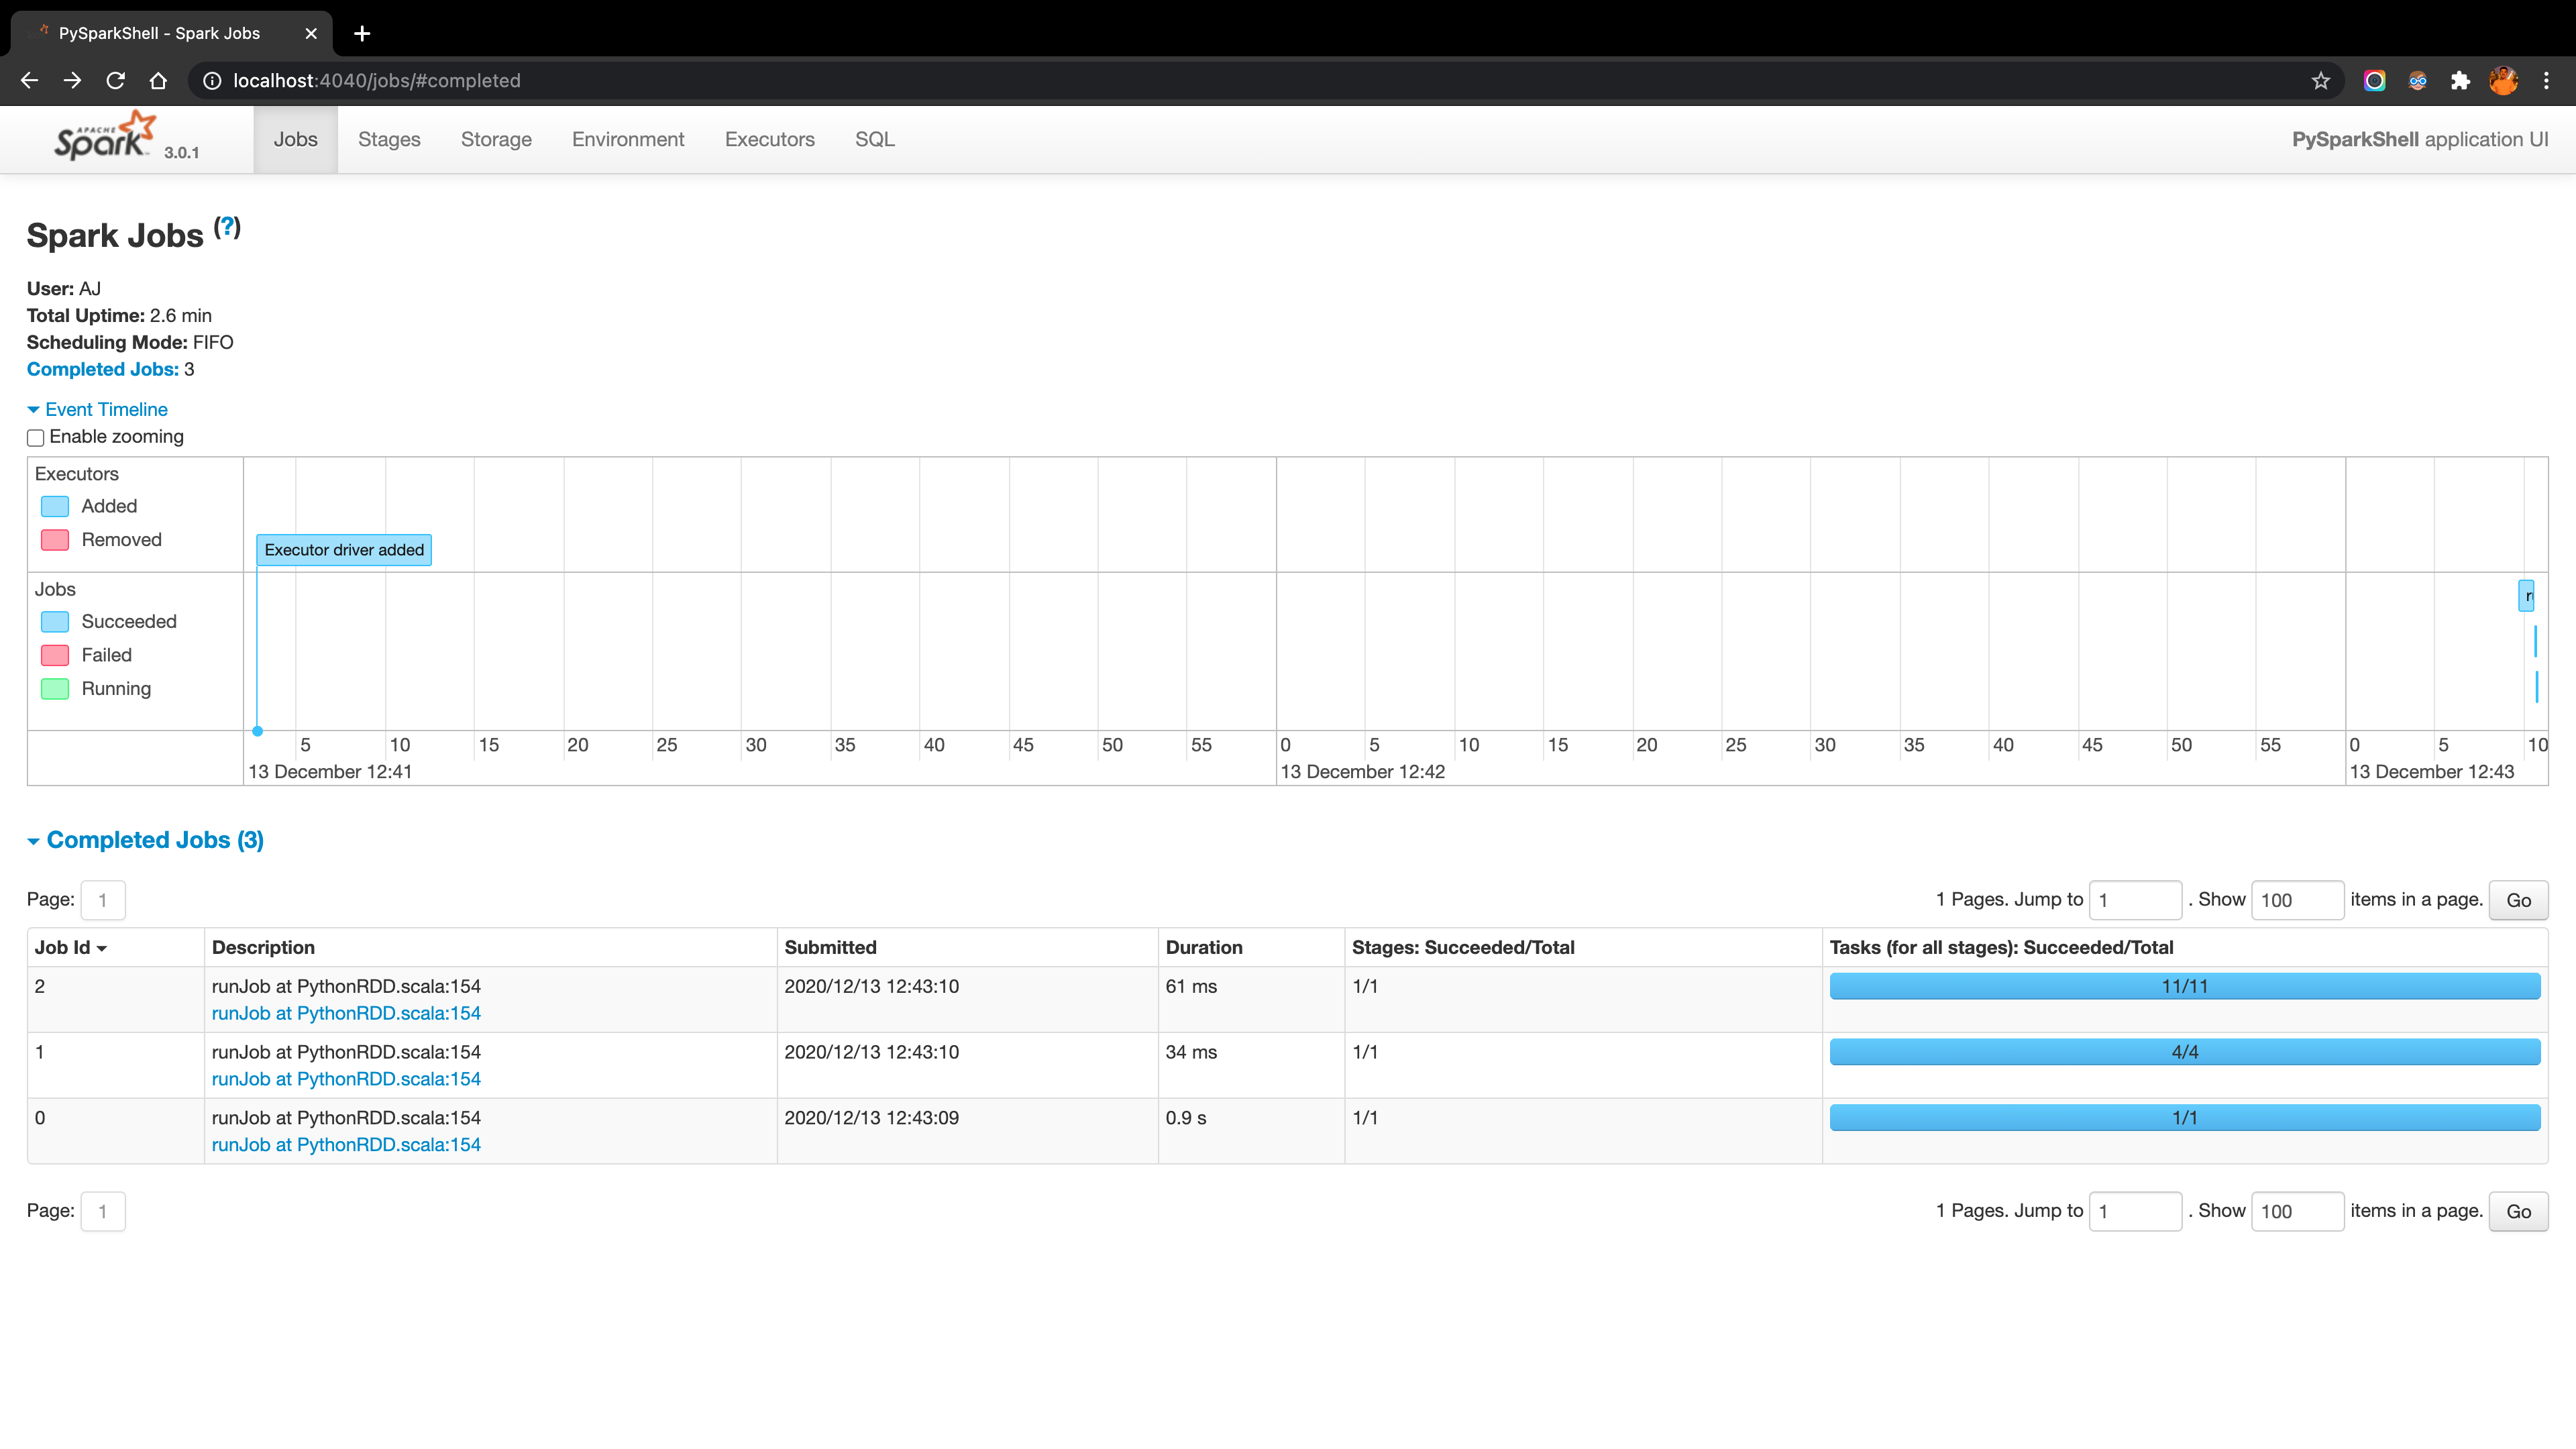
To manually start any other Spark server, can go to the directory /usr/local/Cellar/apache-spark/3.0.1/libexec/sbin and run the function list in the sbin folder:
For example, under the sbin folder, run ./start-master.sh to start the Master server and the Master server UI can be accessed through the link: https://localhost:8080/ as shown below: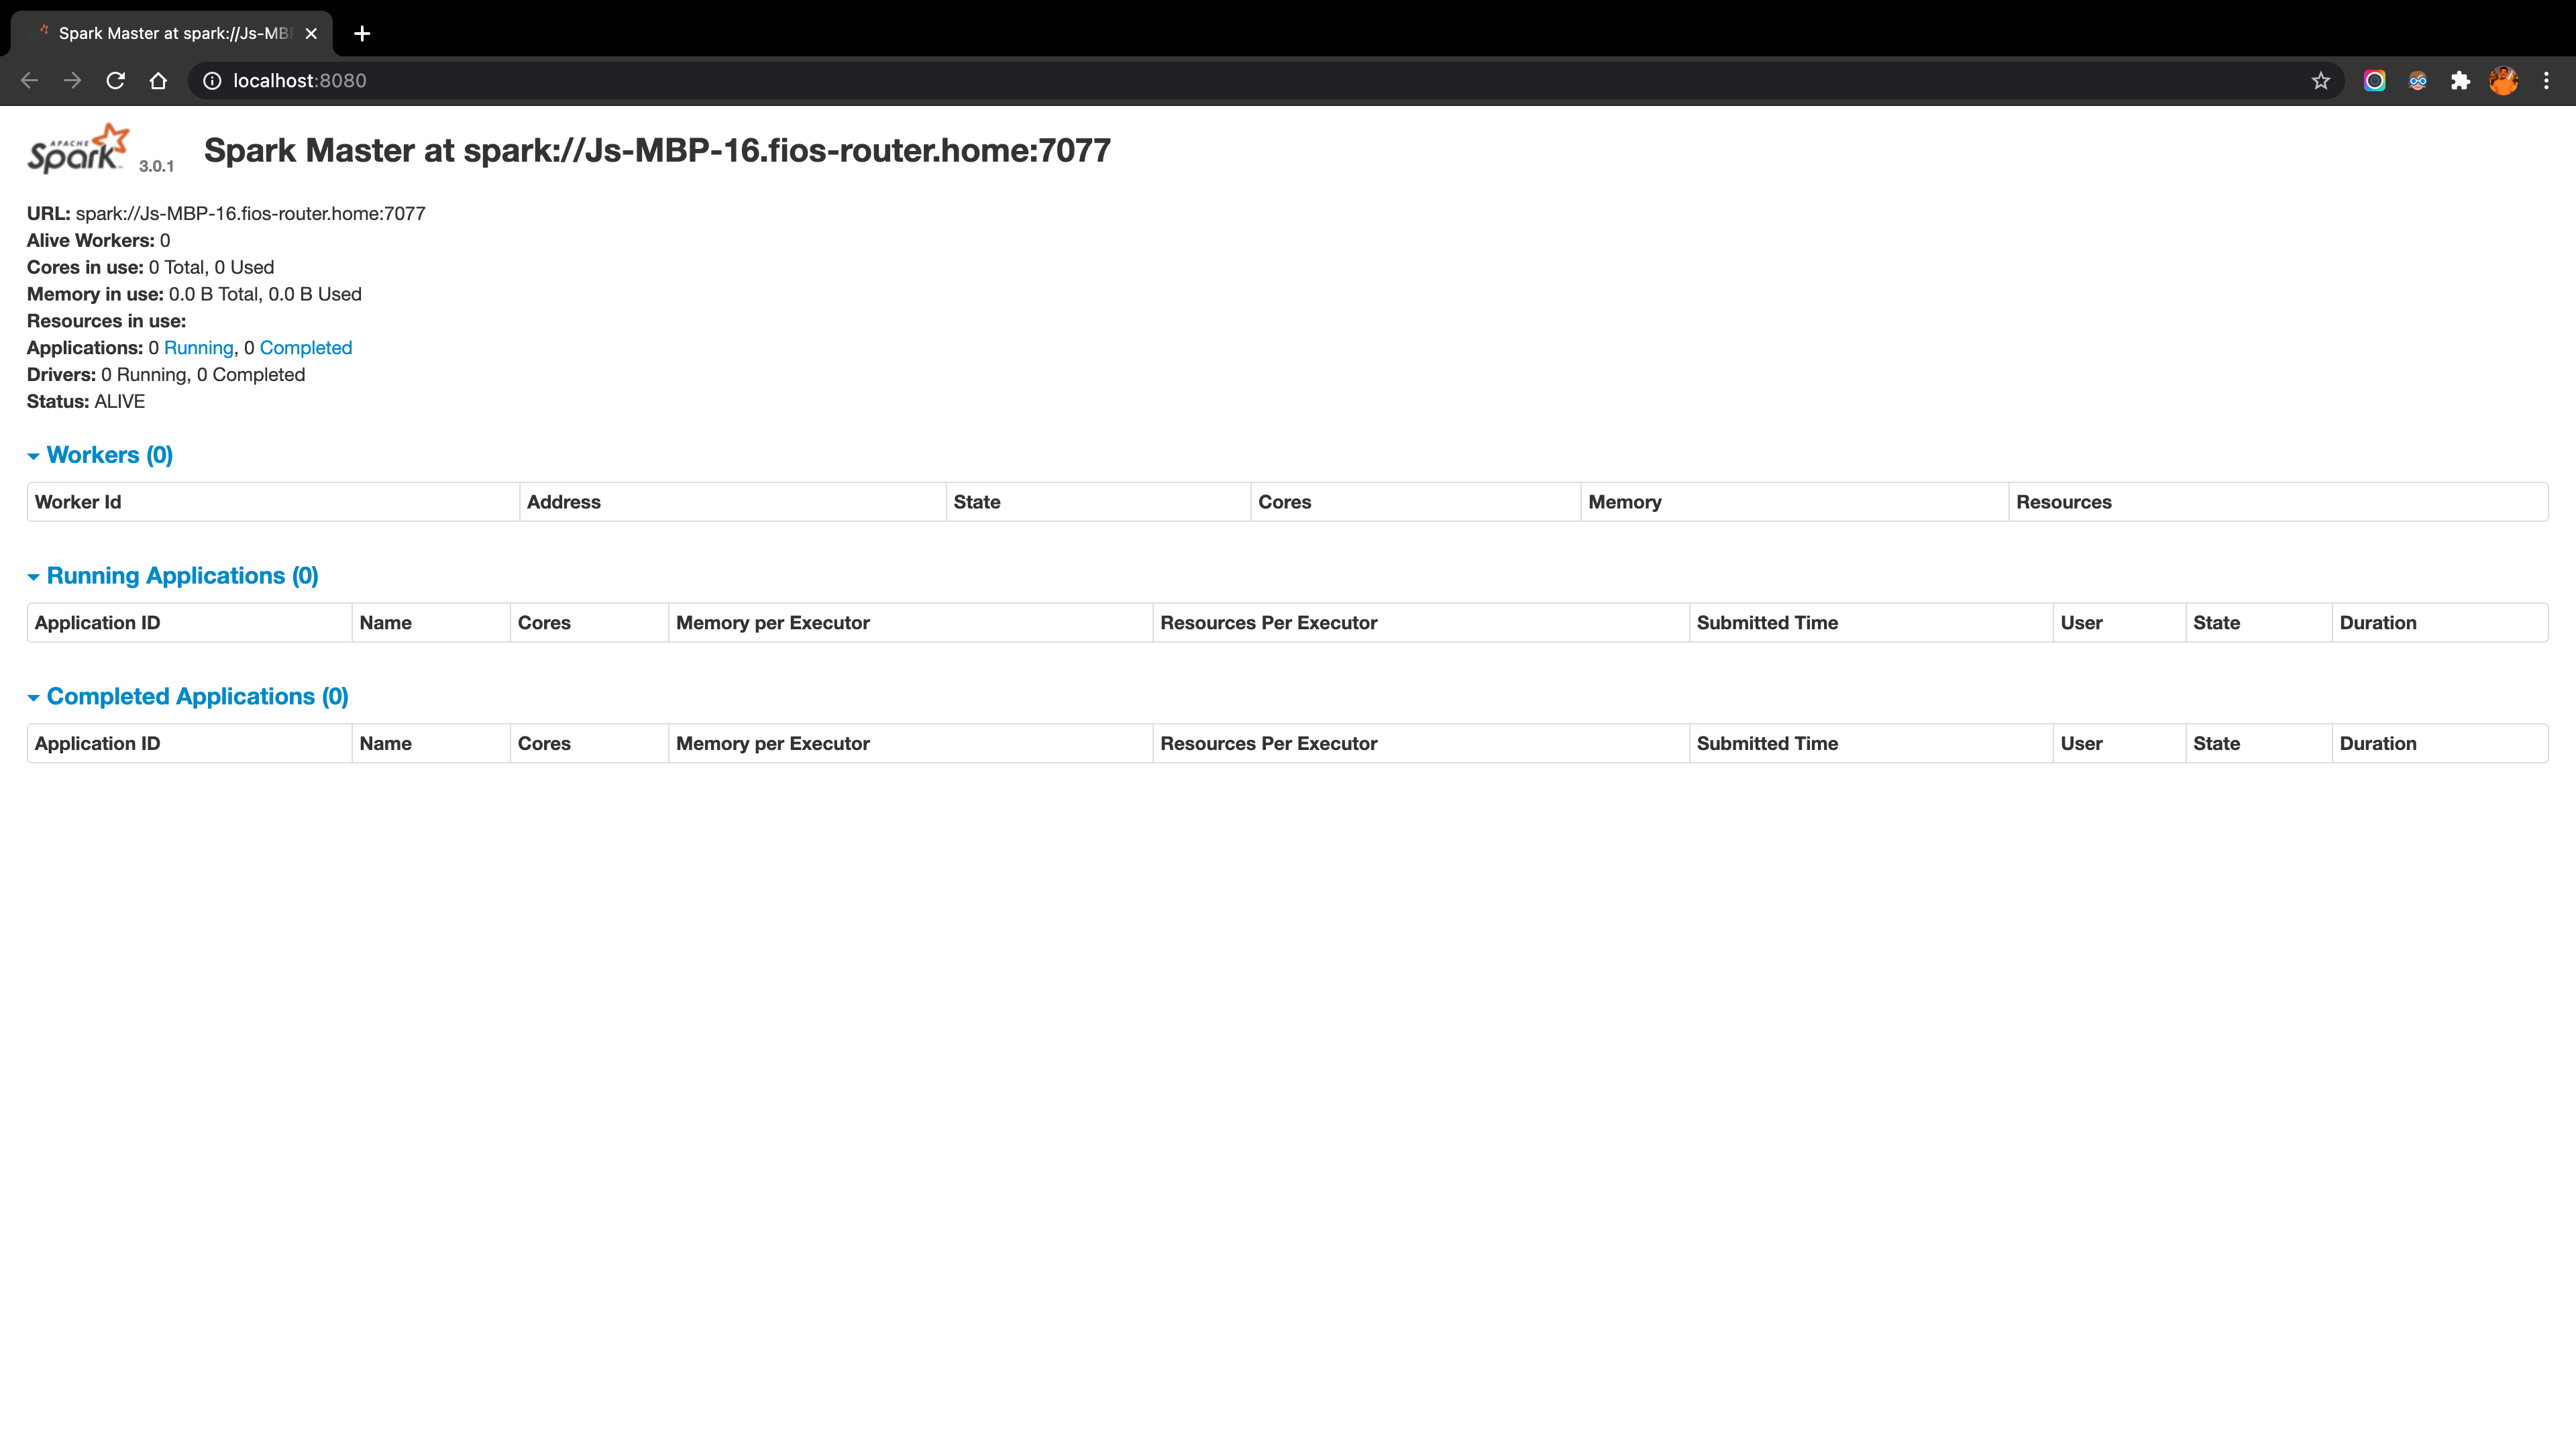
3.2. Working with AWS EMR
3.2.1. Create a Spark cluster on AWS EMR
Under AWS EMR, I create a Spark cluster spark-emr with the configuration showed in the screenshot below: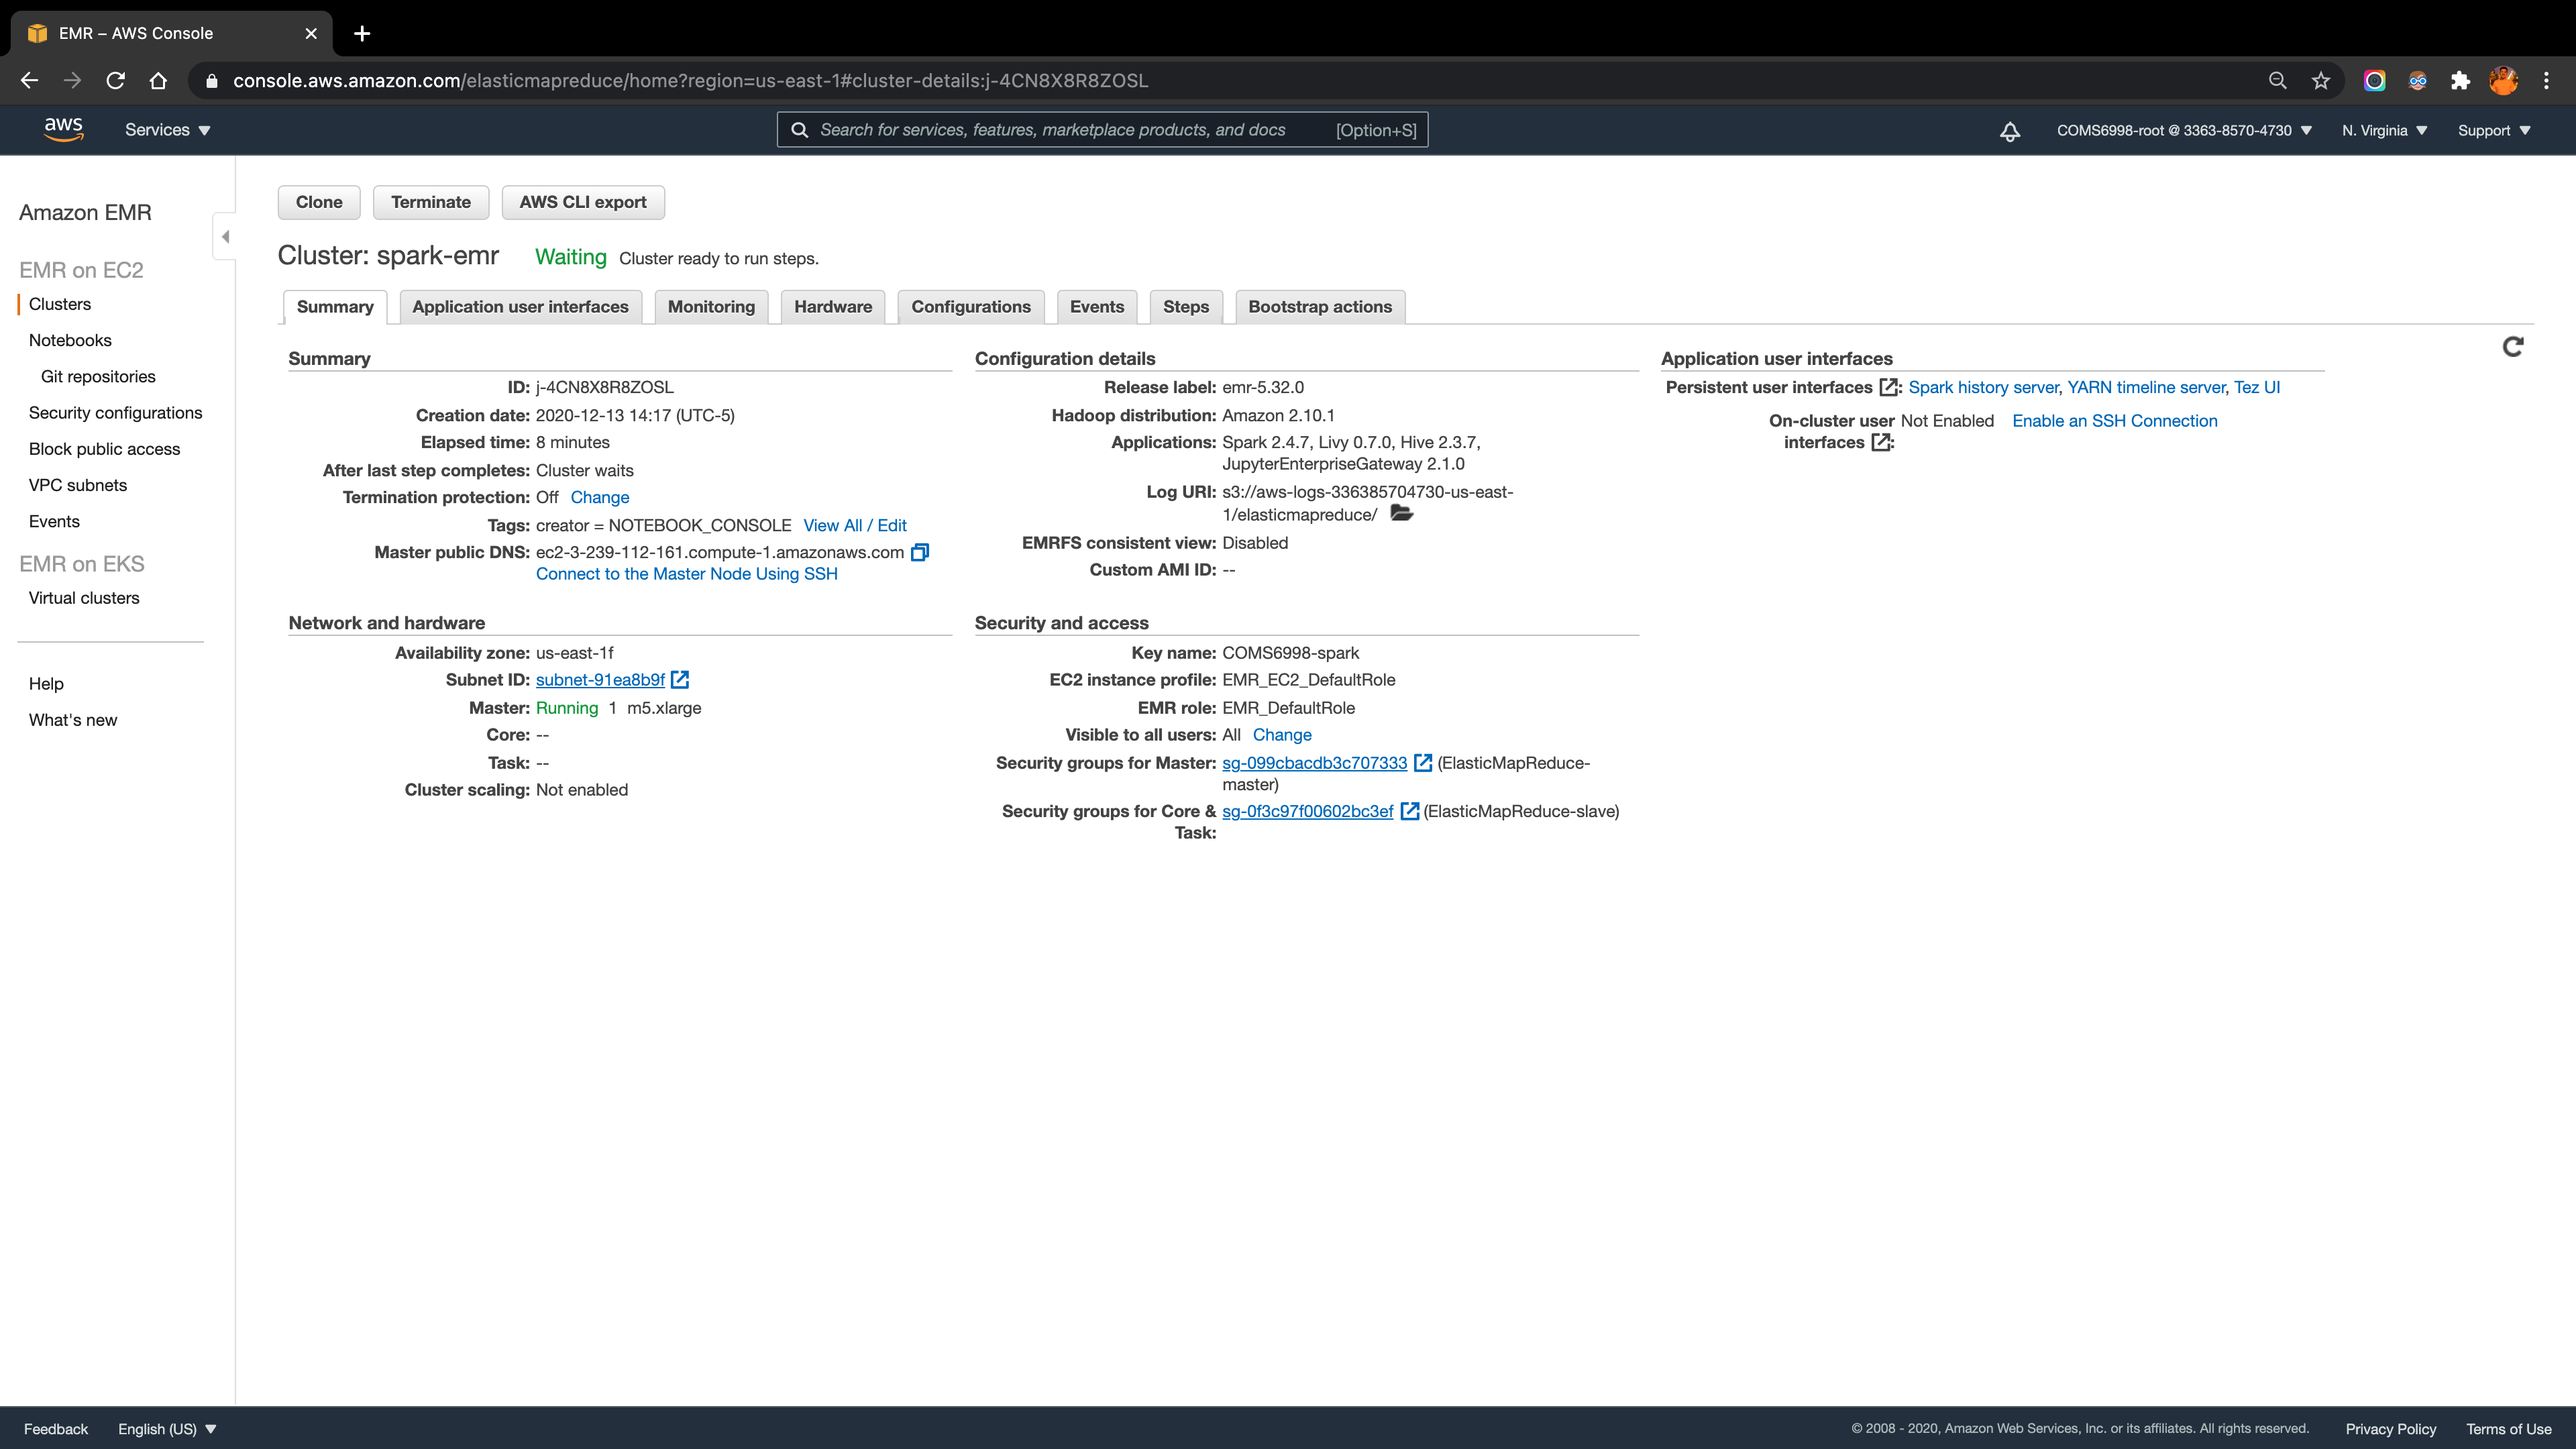
3.2.2. Working with EMR Notebooks
As mentioned in the AWS EMR documentation, the user can use Amazon EMR Notebooks along with Amazon EMR clusters running Apache Spark to create and open Jupyter Notebook and JupyterLab interfaces within the Amazon EMR console.
In the EMR Notebooks panel, I start a notebook attached to the cluster created in the above step (make sure the cluster installs the application JupyterEnterpriseGateway). Then open the notebook under the PySpark environment and run some test code. The screenshot below reflects the success of the Spark job processing.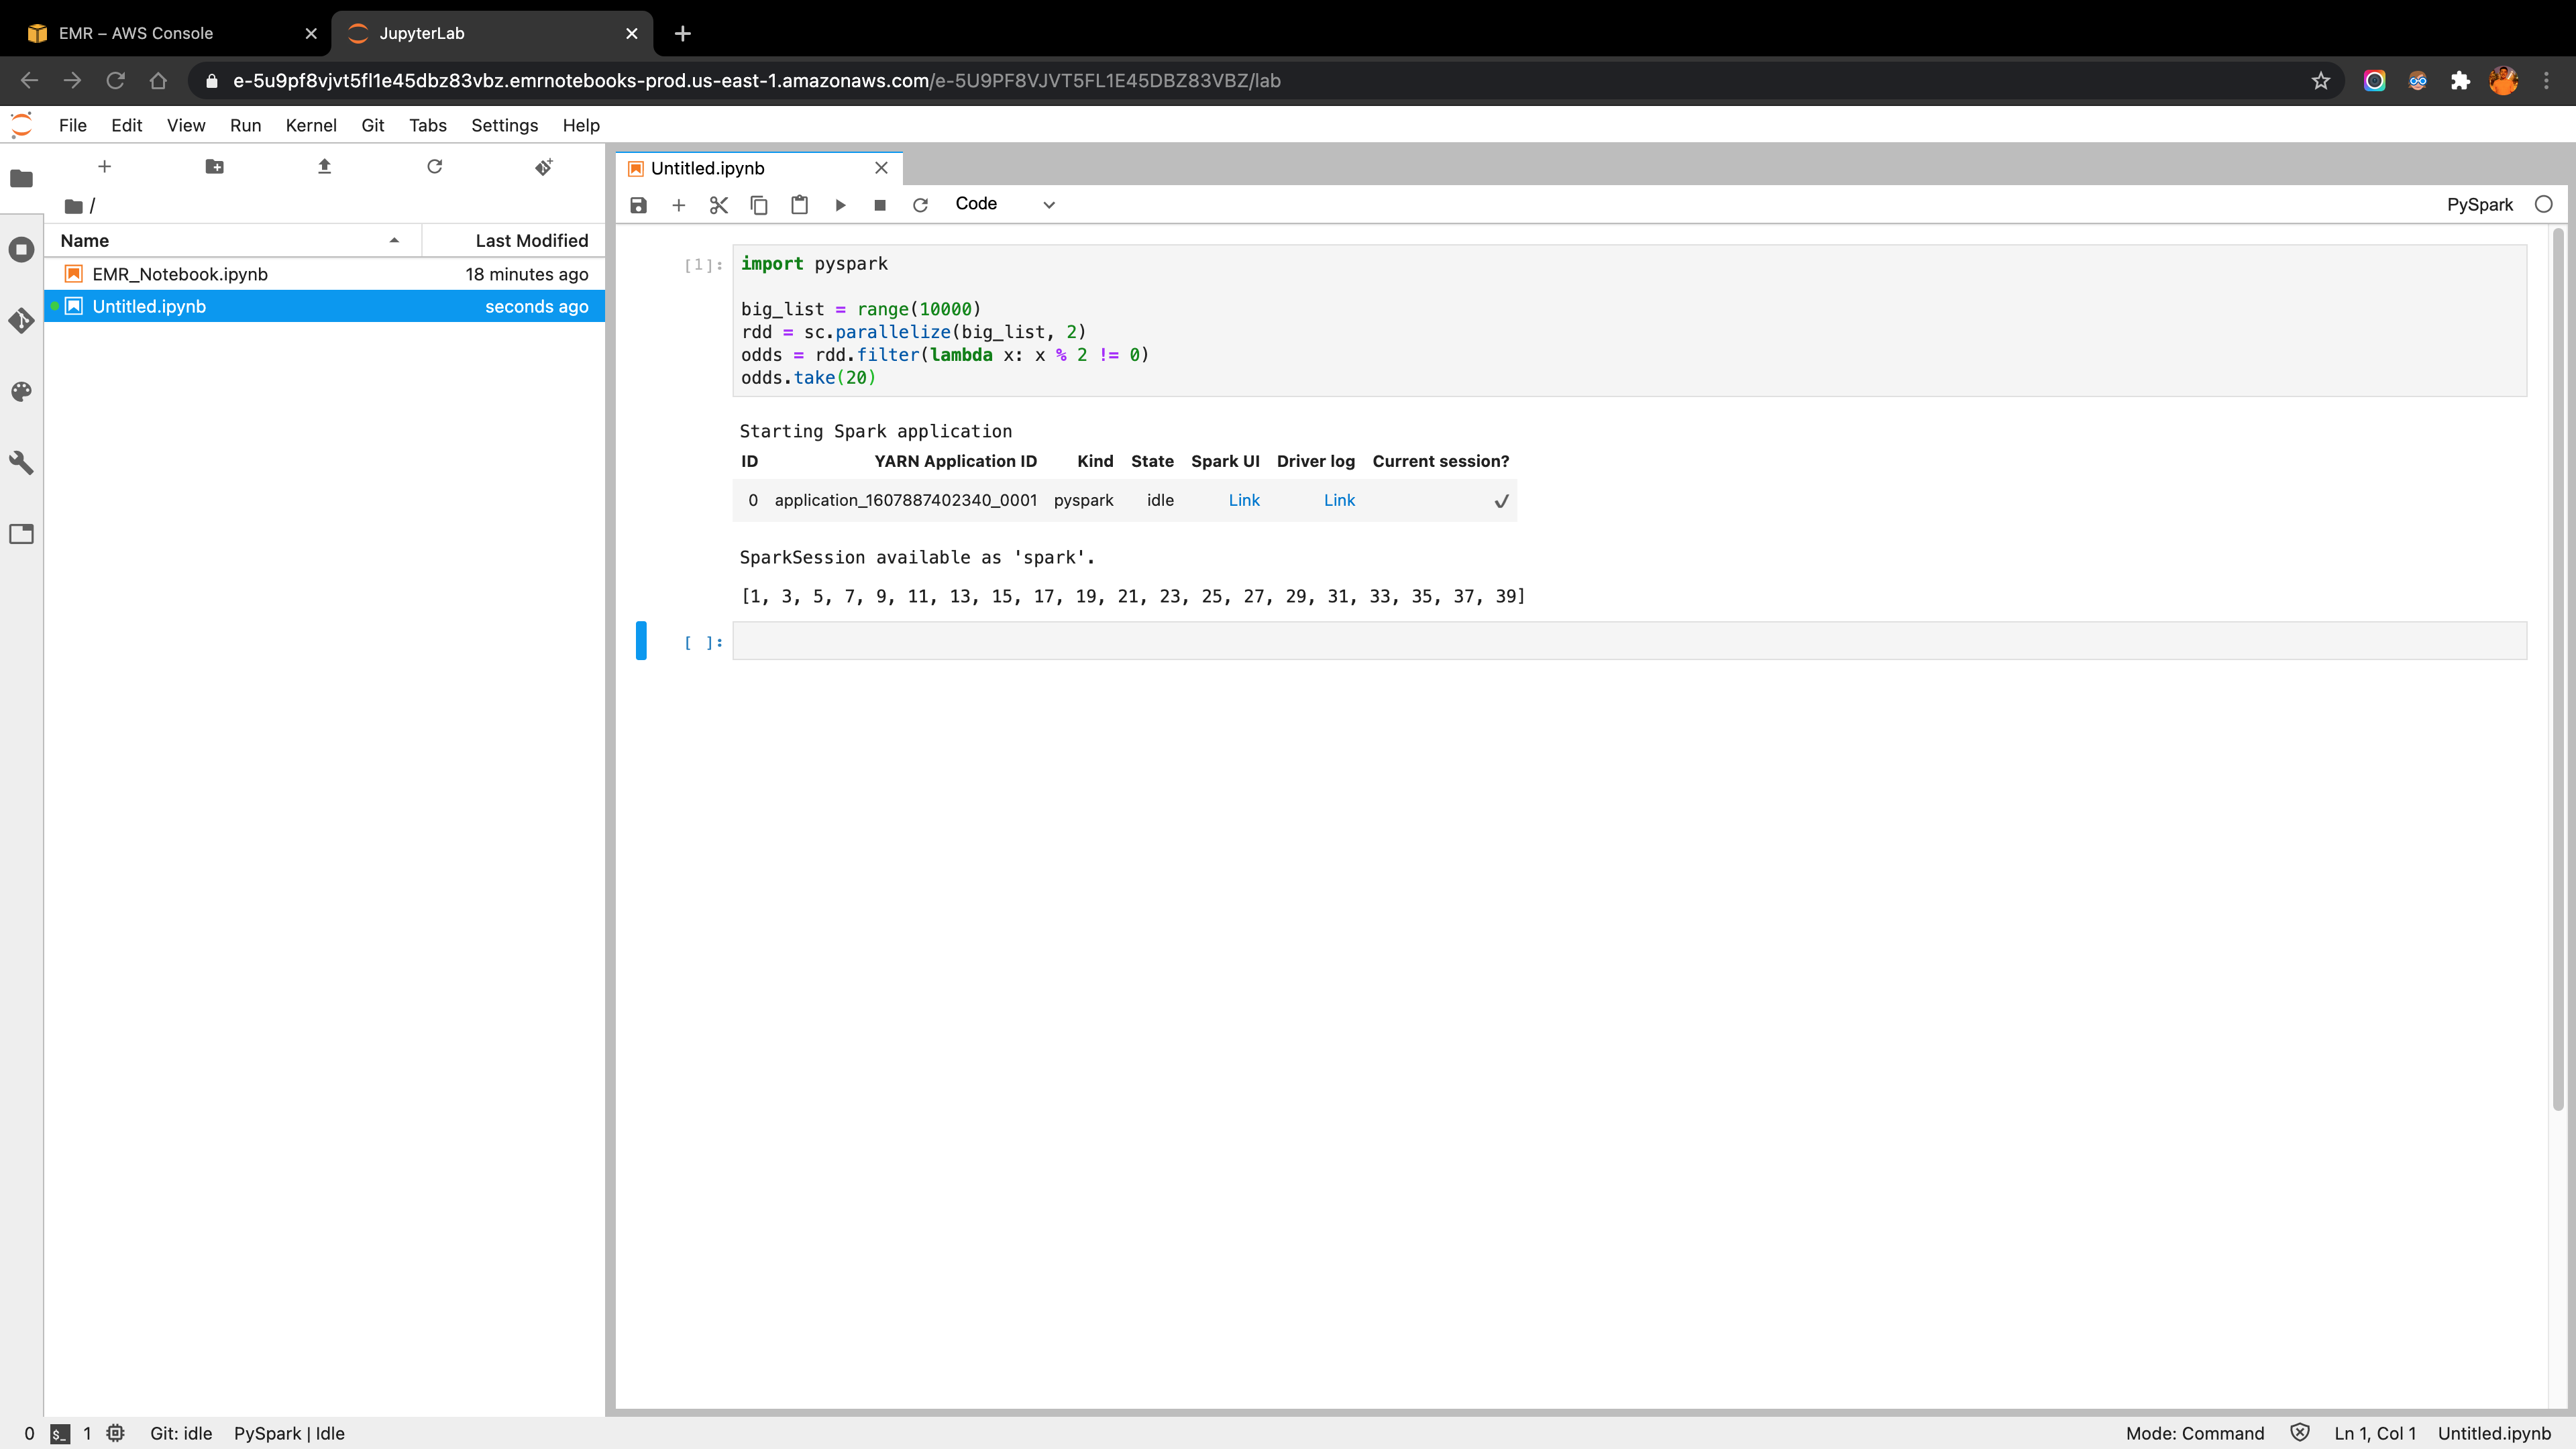
3.2.3. Submit a PySpark job to the EMR cluster
The main idea for this part is to build a simple spark job and execute it as a step in the EMR cluster.
3.2.3.1. Create the job script and save it in the S3 bucket
The following python script is a sample Word Count job that was used later. I upload it into the S3 bucket with the path s3://pyspark-job/script/pyspark_word_count.py.
from pyspark import SparkContext
import sys
if __name__ == "__main__":
    if len(sys.argv) != 3:
        print("Usage: wordcount ", file=sys.stderr)
        exit(-1)
    sc = SparkContext(appName="demo-word-count")
    text_file = sc.textFile(sys.argv[1])
    counts = text_file.flatMap(lambda line: line.split(" ")).map(lambda word: (word, 1)).reduceByKey(lambda a, b: a + b)
    counts.saveAsTextFile(sys.argv[2])
    sc.stop()
3.2.3.2. Create a input text and save it in the S3 bucket
I generate a 10 paragraphs 1000 words Lorem Ipusm text file as the input for the Word Count job and upload it into the S3 bucket with the path s3://pyspark-job/input/text.txt.
3.2.3.3. Submit the job as a step to the cluster
To submit the PySpark job as a step to the EMR cluster and then execute in it, and save the result as a output file in the S3 bucket, following code do that job:
aws emr add-steps --cluster-id [Cluster-ID] \
--steps Type=spark,Name=[Name-Your-Step],\
Args=[--deploy-mode,cluster,--master,yarn,\
--conf,spark.yarn.submit.waitAppCompletion=false,\
--num-executors,2,--executor-cores,2,--executor-memory,1g,\
[Path-To-Script-In-S3],\
[Path-To-Input-In-S3],\
[Path-To-Output-In-S3]],\
ActionOnFailure=CONTINUE
Replace all the placeholders with the related values and run the command line:
aws emr add-steps --cluster-id "j-4CN8X8R8ZOSL" \
--steps Type=spark,Name=spark-job-step,\
Args=[--deploy-mode,cluster,--master,yarn,\
--conf,spark.yarn.submit.waitAppCompletion=false,\
s3://pyspark-job/script/pyspark_word_count.py,\
s3://pyspark-job/input/text.txt,\
s3://pyspark-job/output/],\
ActionOnFailure=CONTINUE
You may need to run setopt +o nomatch first if you are running the zsh shell in your Terminal to avoid any zsh: no match found error.
After successfully execute the command, the StepId will be returned:
{
    "StepIds": [
        "s-8YATQIVZWW7X"
    ]
}
And then under the EMR cluster Steps tab, step spark-job-step status will turn to Completed after few seconds as shown below:
Meanwhile, under the output folder in the S3 bucket, step results are saved as separate part files which store the cout number for each word in the input file: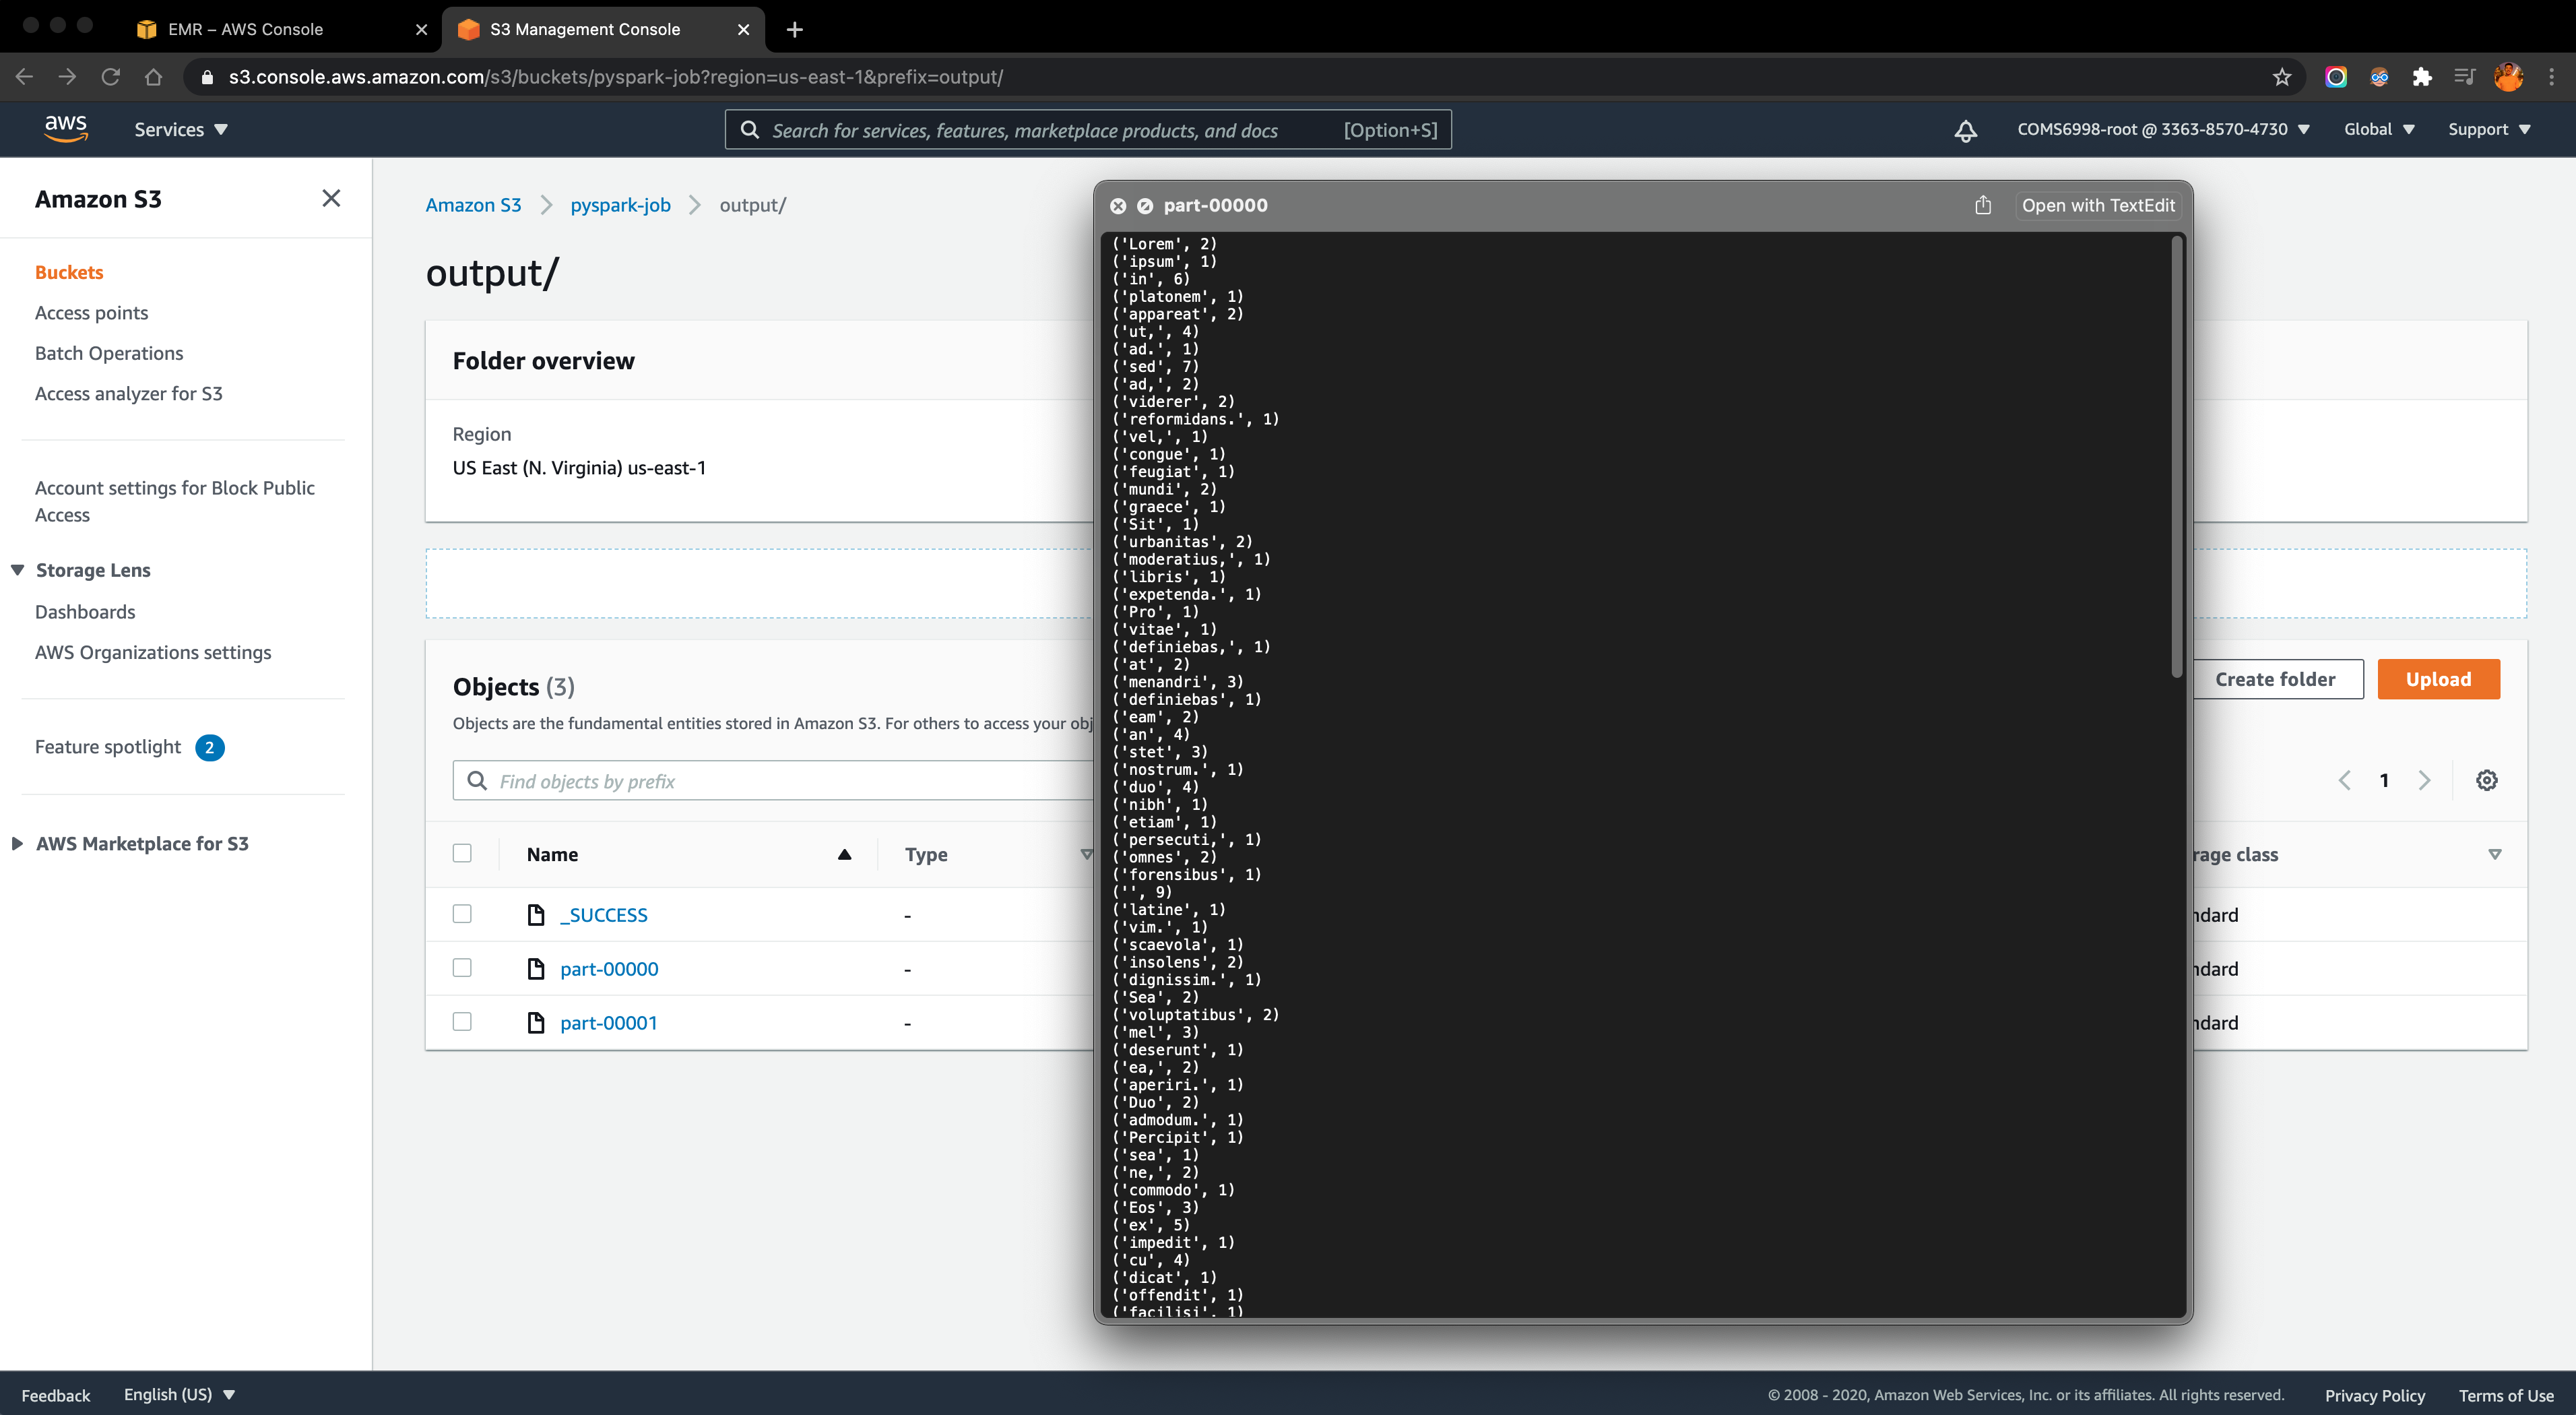
4. Task 4: Real-time Credit Card Fraud Detection Pipeline
4.1. Workflow and Architecture
Following figure illustrates the workflow and architecture of the whole pipeline:
For the set-up part, I first simulate 100 customers’ information and stored in the customer.csv file, and over 10K transaction records stored in the transaction_training.csv file. Then, call a Spark SQL job to retrieve those data and import them into a Cassandra database. Next, run a Spark ML job to read the data from Cassandra, train on those data and create the models (Preprocessing and Random Forest) to classify the transaction records are fraud or not.
After the models are saved to the file system, start a Spark Streaming job that would load the ML models and also consume credit card transactions from Kafka. Create a Kafka topic and produce transaction records from the transaction_testing.csv file as messages that would be consumed by the Spark Streaming job. And the streaming job would predict whether these transactions are fraud or not and then save them into the fraud_transaction and non_fraud_transaction tables separately based on the classification.
With the classified in-coming transaction records stored in the Cassandra database, I use the Spring Boot framework to display the frand and non-fraud transactions in real-time on the dashboard web page. Meanwhile, I also use the Flask framework to create two REST APIs that could easily retrieve the customer’s information and create the transaction statement for each customer.
A video demo for the workflow could be found here: https://youtu.be/fOVsxk16b0w
4.2. Implementation Details
4.2.1. Customers & Transactions dataset
Stimulate 100 customers using Mockaroo. For each record, it includes following columns (information):
- cc_num: credit card number which uniquely identify each card / customer
- first: customer’s first name
- last: customer’s last name
- gender: customer’s gender
- street
- city
- state
- zip: zip code for the address above
- lat: latitude for the address above
- long: longitude for the address above
- job: customer’s vocation
- dob: the date of birth for the customer
Also generate over 10K transaction records for these customers using the same way. For each record, it includes following columns (information):
- cc_num: credit card number which uniquely identify each card / customer
- first: customer’s first name
- last: customer’s last name
- trans_num: transaction number
- trans_date: transaction date
- trans_time: transaction time
- unix_time: transaction time in unix timestamp format
- category: category for the purchased item
- amt: transaction amount
- merchant: the place that the transaction happened
- merch_lat: latitude for the merchant
- merch_long: longitude for the merchant
- is_fraud: boolean to indicate the transaction is fraud or not
These transaction records would be later used as the training set and testing set with the splitting ratio as 80%.
4.2.2. Spark ML job
First, run a Spark SQL job to retrieve the customers and transaction training data and import them into the Cassandra database. When importing the transactions data, the job also calculates two extra features age and distance where age is the age of each customer by the time the data are imported according to his/her date of birth; distance is the distance between the customer’s address and the merchant’s address by calculating the Euclidean distance between two places using the latitude & longitude information. All the training data (including two extra features) would be splitted and stored in the fraud table and non-fraud table separately based on whether each record is fraud or not.
Spark ML Job will load fraud and non-fraud transactions from fraud and non-fraud tables respectively. This will create 2 different dataframes in Spark. Next, these 2 dataframes are combined together using Union function, and Spark ML Pipeline Stages will be applied on this dataframe.
- First, String Indexer will be applied to transform the selected columns into double values. Since the machine learning algorithm would not understand string values but only double values.
- Second, One Hot Encoder will be applied to normalize these double values. The reason double values must be normalised is because machine-learning algorithm assumes higher the value better the category.
- Third, Vector Assembler is applied to assemble all the transformed columns into one column. This column is called a feature column. And the values of this column is a vector. This feature column will be given as input to the model creation algorithm.
After assembling the feature column, then train the algorithm with this dataframe. However, currently data are not balanced, given that the number of non-fraud transactions is way larger than the number of fraud transactions. If such unbalanced data are used for training, then the algorithm would not create an accurate model. Hence, there is one more step needed to apply before training is to balance the data to enforce the number of non-fraud transactions must be almost equal to the number of fraud transactions. Here, the job uses the K-means algorithm to reduce the number of non-fraud transactions. After that, the job will combine both the dataframes and form a single dataframe as a balanced one. Then apply the Random Forest algorithm on this dataframe that uses the feature column for training and create the prediction/classification model. And finally, save the model to the filesystem.
Following figure illustrates the entire Spark ML job workflow:
4.2.3. Kafka producer
Create a Kafka topic named as creditcardTransaction with 3 partitions.
kafka-topics --zookeeper localhost:2181 --create --topic creditcardTransaction --replication-factor 1 --partitions 3The Kafka producer job would randomly select transactions from the transaction training dataset as messages and save the current timestamp into the messages as the transaction time. Later, these messages would be fed into the Spark Streaming job.
4.2.4. Spark Streaming job
In the Spark Streaming job, it first starts by consuming credit card transaction messages from Kafka via the topic creditcardTransaction. Then, for each message, it reads customer data from Cassandra to compute age of the customer and calculate distance between merchant and customer place, since age and distance will be used as features in the prediction. After that, load both Preprocessing and Random Forest models that were created by Spark ML job. These 2 models will be used to transform and predict whether a transaction is fraud or not. Once the transactions are predicted, the records would be saved in the Cassandra database where fraud transactions will be saved to the fraud table and non-fraud transactions will be saved to the non-fraud table. Also each message would be offered a partition number and an offset number to indicate the location in the topic. These partition and offset information would be saved in the Kafka offset table to help to achieve exactly once semantics.
4.2.5. Front-end dashboard
The front-end dashboard class is designed with Spring Bot framework that would select fraud and non-fraud transactions from Cassandra tables and display it on the dashboard in real-time. This method will call a select query to retrieve the latest fraud and non-fraud transactions that occurred in the last 5 seconds and display it on the dashboard. To display the record only once, the method maintains the max timestamp of previously displayed fraud/non-fraud transactions. And in the current trigger, it would only select those transactions whose timestamp is greater than the previous max timestamp.
Following screenshot illustrates a basic scenario of the dashboard interface:
4.2.6. REST API for customers and transaction statements
I also design two REST APIs with the Flask framework to easily retrieve the customer information and create transaction statements for customers. They are all implemented by calling SQL queries to select records from the Cassandra non-fraud table.
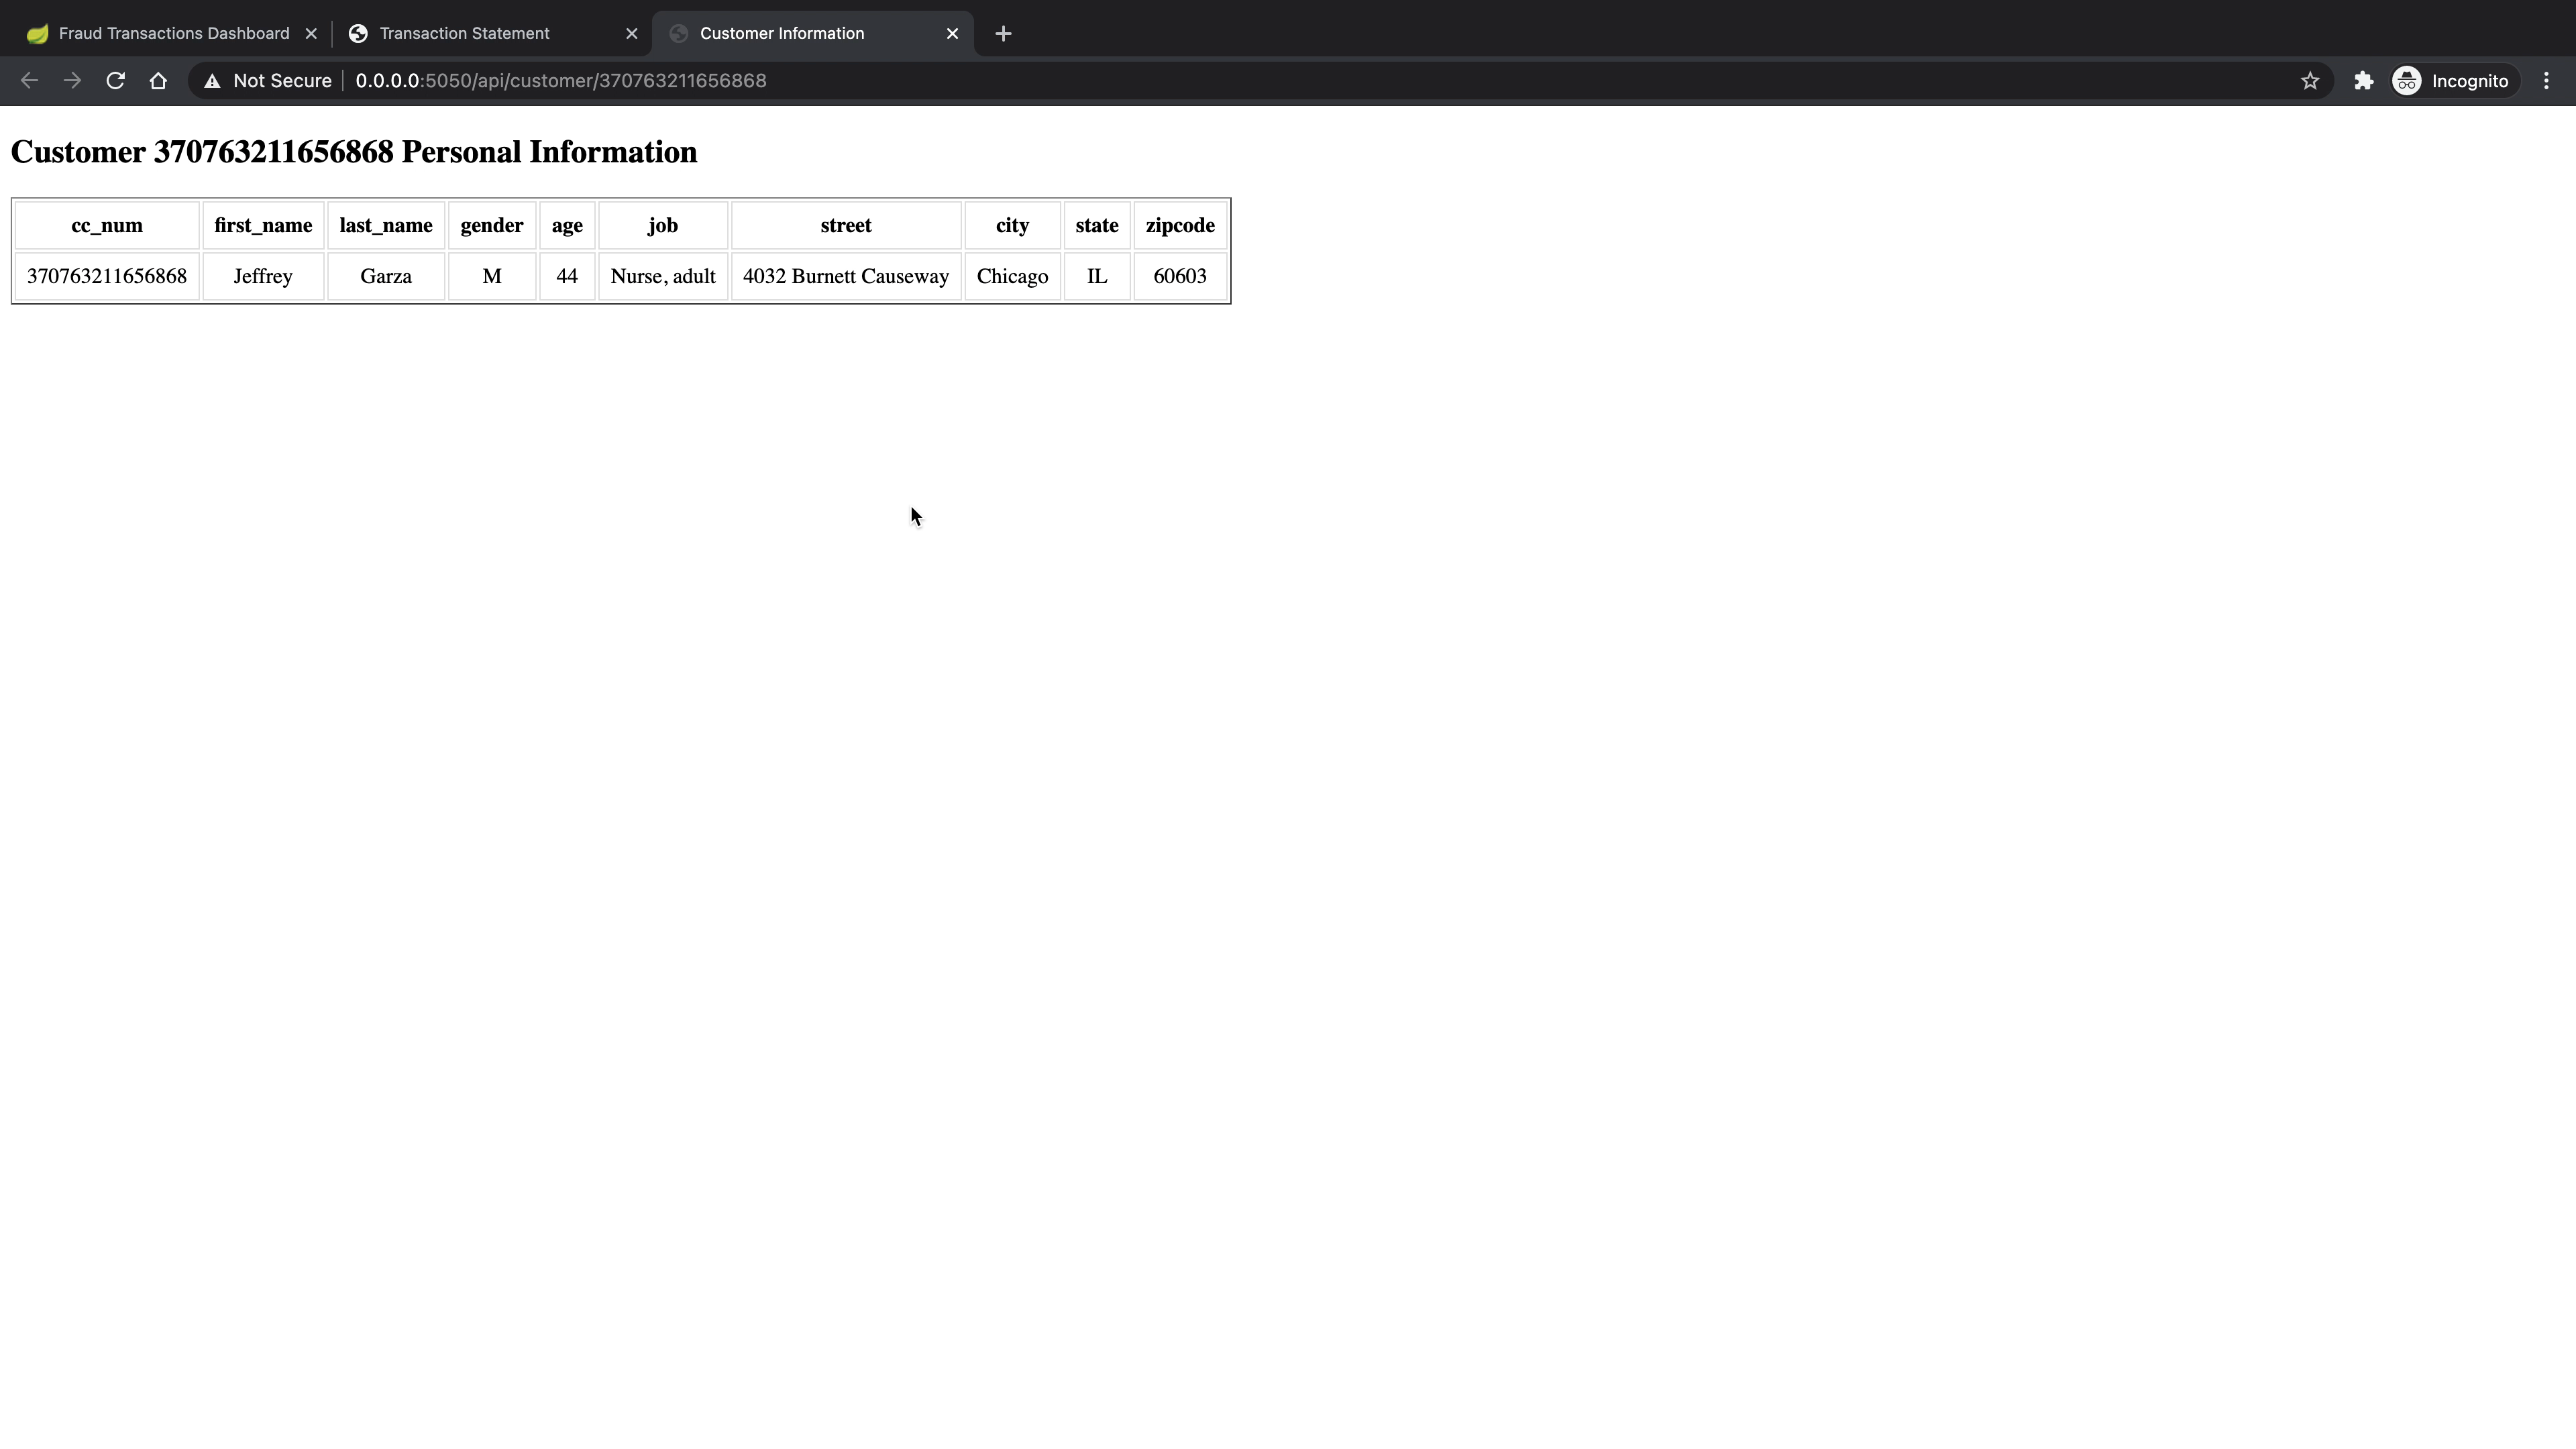
- For customer information, the endpoint is:
/api/customer/<cc_num>which would return basic information for the credit card<cc_num>owner. - For creating a transaction statement for the specific customer, the endpoint is:
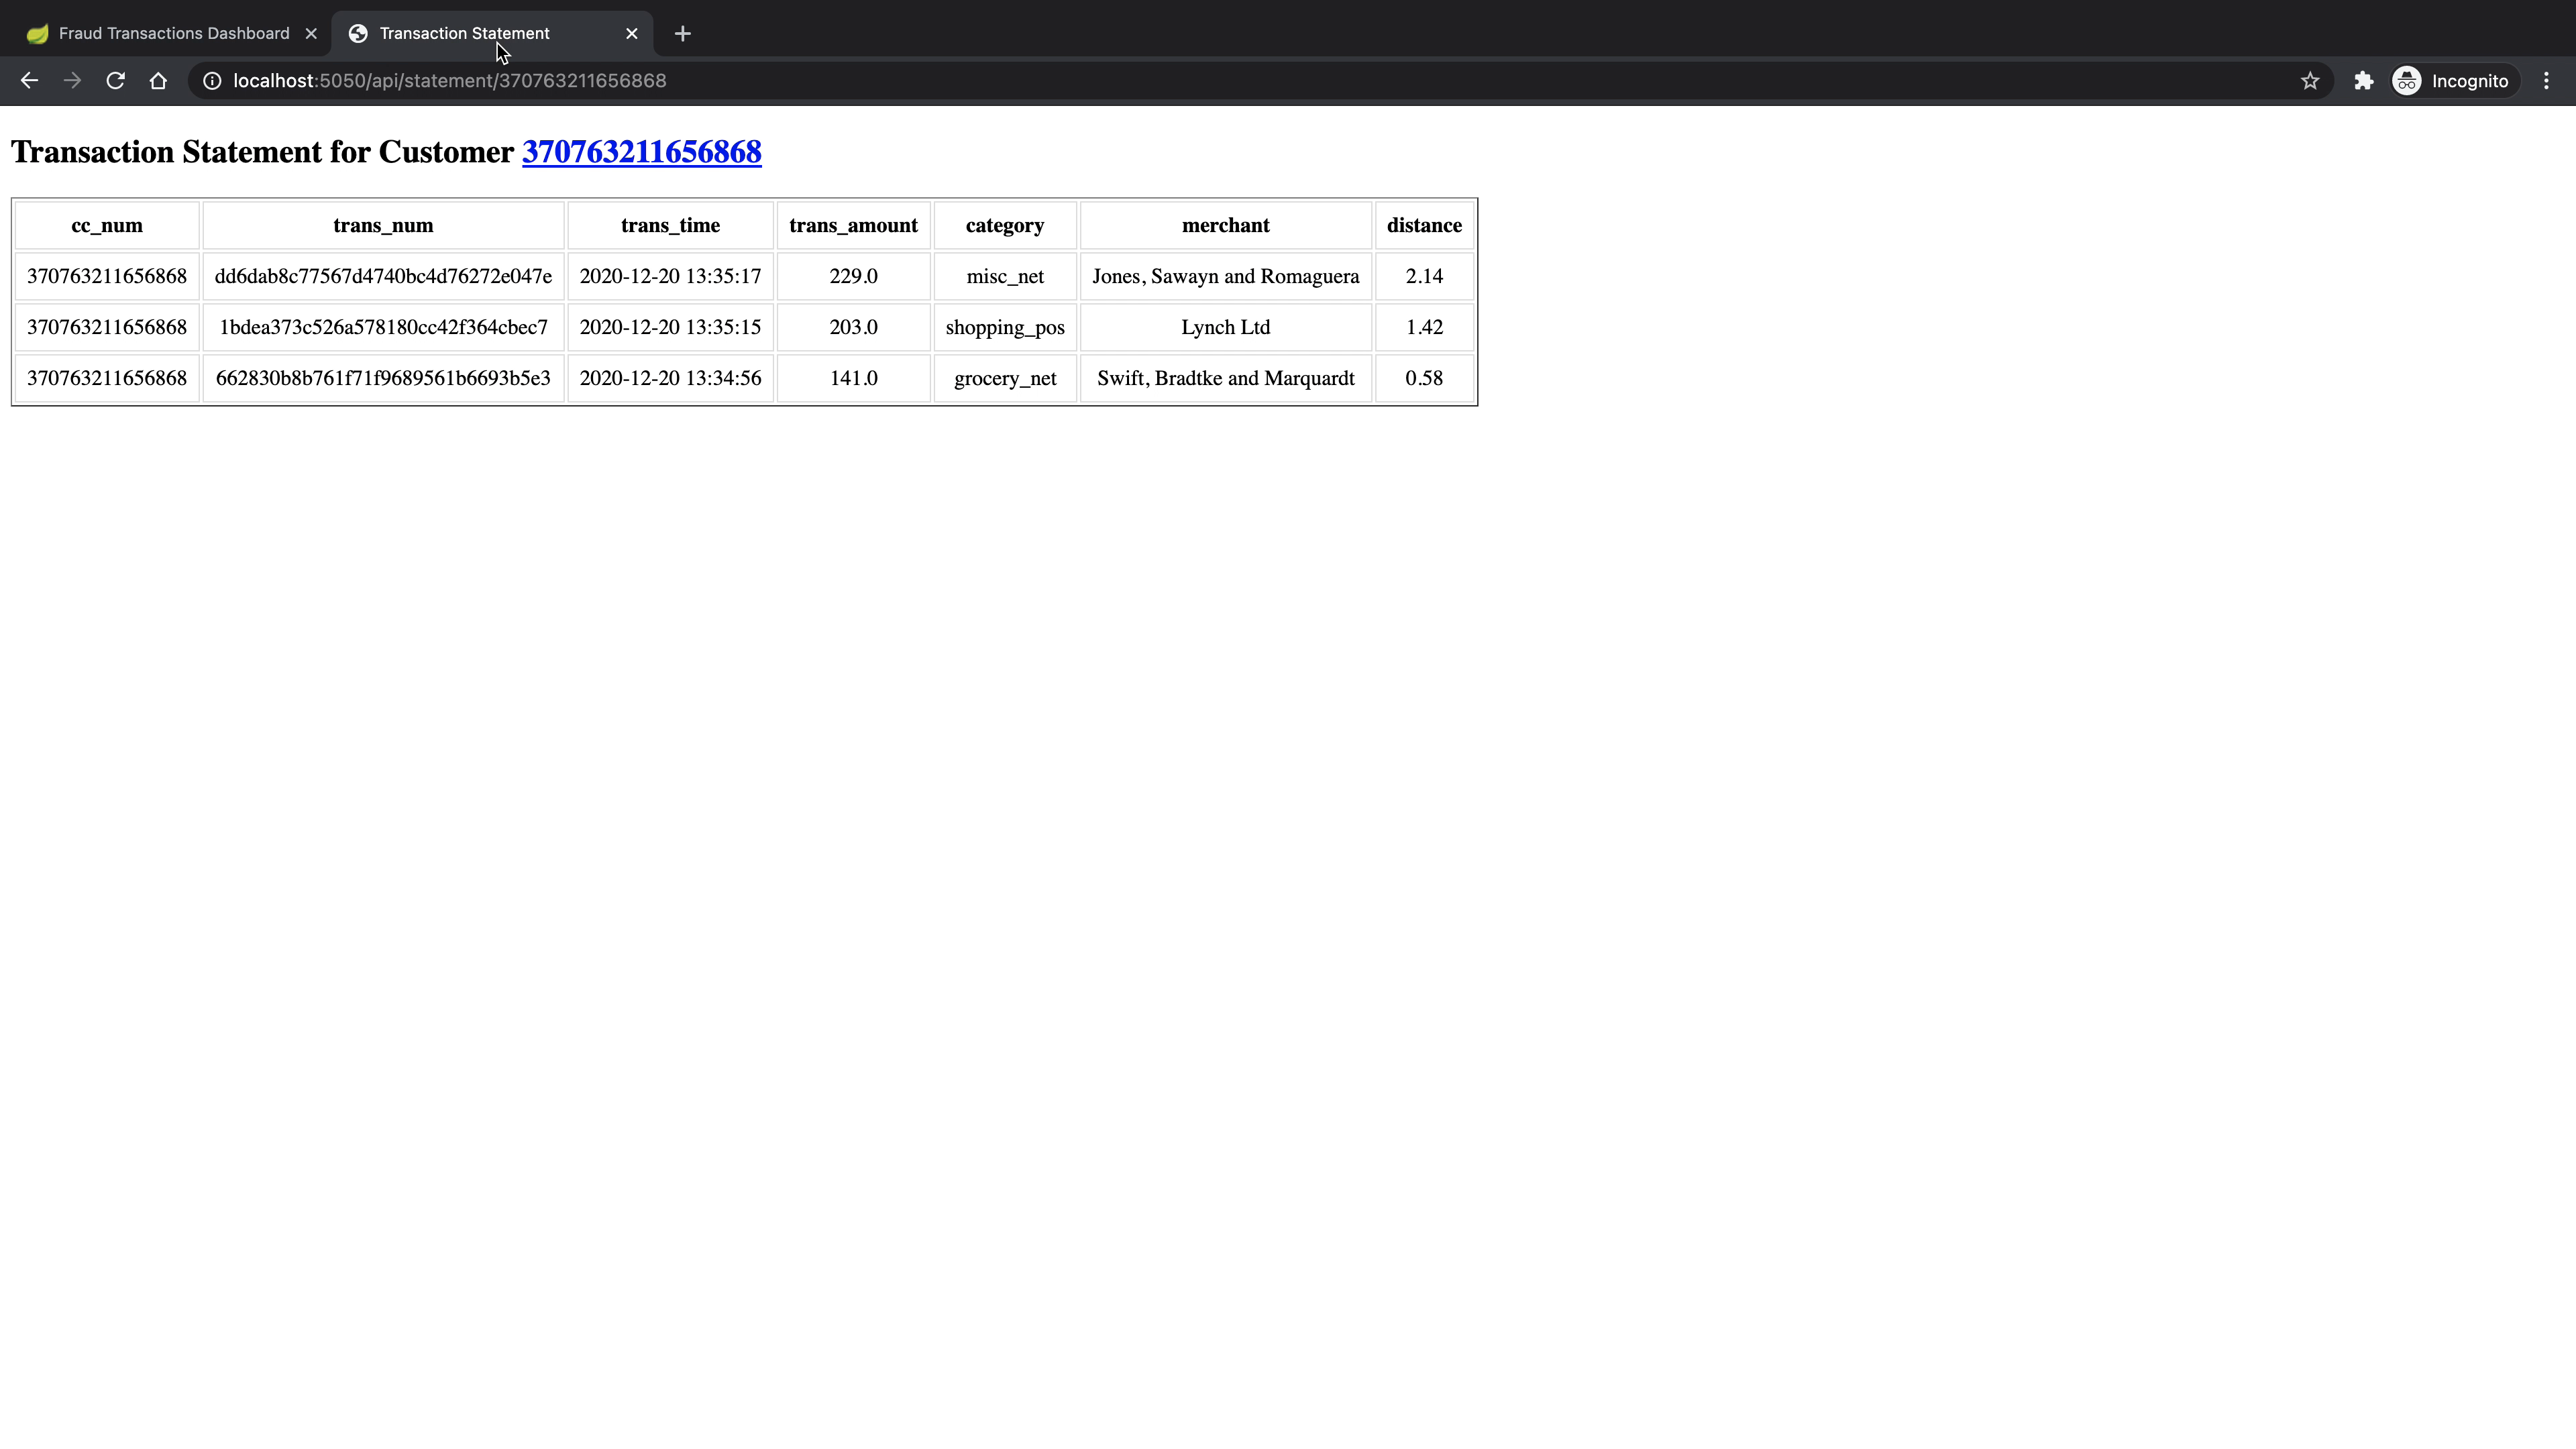
api/statement/<cc_num>which would return all the transaction records for the credit card<cc_num>and order them by transaction time.
Following screenshots illustrate the examples of two API calls: